
Getting started with Crosswork Planning Collector
Overview
Crosswork Planning provides a comprehensive suite of tools to empower operators to manage their network infrastructure proactively. These tools offer network discovery, analysis, simulation, and optimization capabilities. With Crosswork Planning, operators can unlock a host of benefits, including enhanced visibility and insights, improved performance, reliability, and resiliency, and efficient capacity management.
The Design application may be used to visualize topology, run simulations as well as perform optimizations and uses network models which has been created prior, or built using the Collector application.
The Collector application allows us to perform network discovery, collection, and model building using various supported methods. The collector application takes as its input configuration for basic and advanced model building and traffic and demands. Based on this configuration, the collector application reaches out to the network elements to perform a collection of the desired attributes to populate the network model. It will produce an output network model (ie. plan file) for the collection, containing objects such as nodes, interfaces, demands, etc. The collection process is designed to be extensible, allowing for the use of scripts to augment basic collection, or for custom collection.
This tutorial provides a brief overview of setting up Crosswork Planning Collector.
Note: Please ensure that Smart Licensing has been setup prior to running collection.
Getting started with Collection
After logging in to Crosswork Planning, we select the Collector option.
The Collector may be configured by either of the following methods
- Wizard-based guided setup using Getting Started selection
- Manual setup by setting up Credentials, Network Profiles, Agents and Collections
- Importing configuration file from WAN Automation Engine (using WAE configuration migration tool)
By default, Crosswork will provide a wizard-based setup if no existing configuration exists.
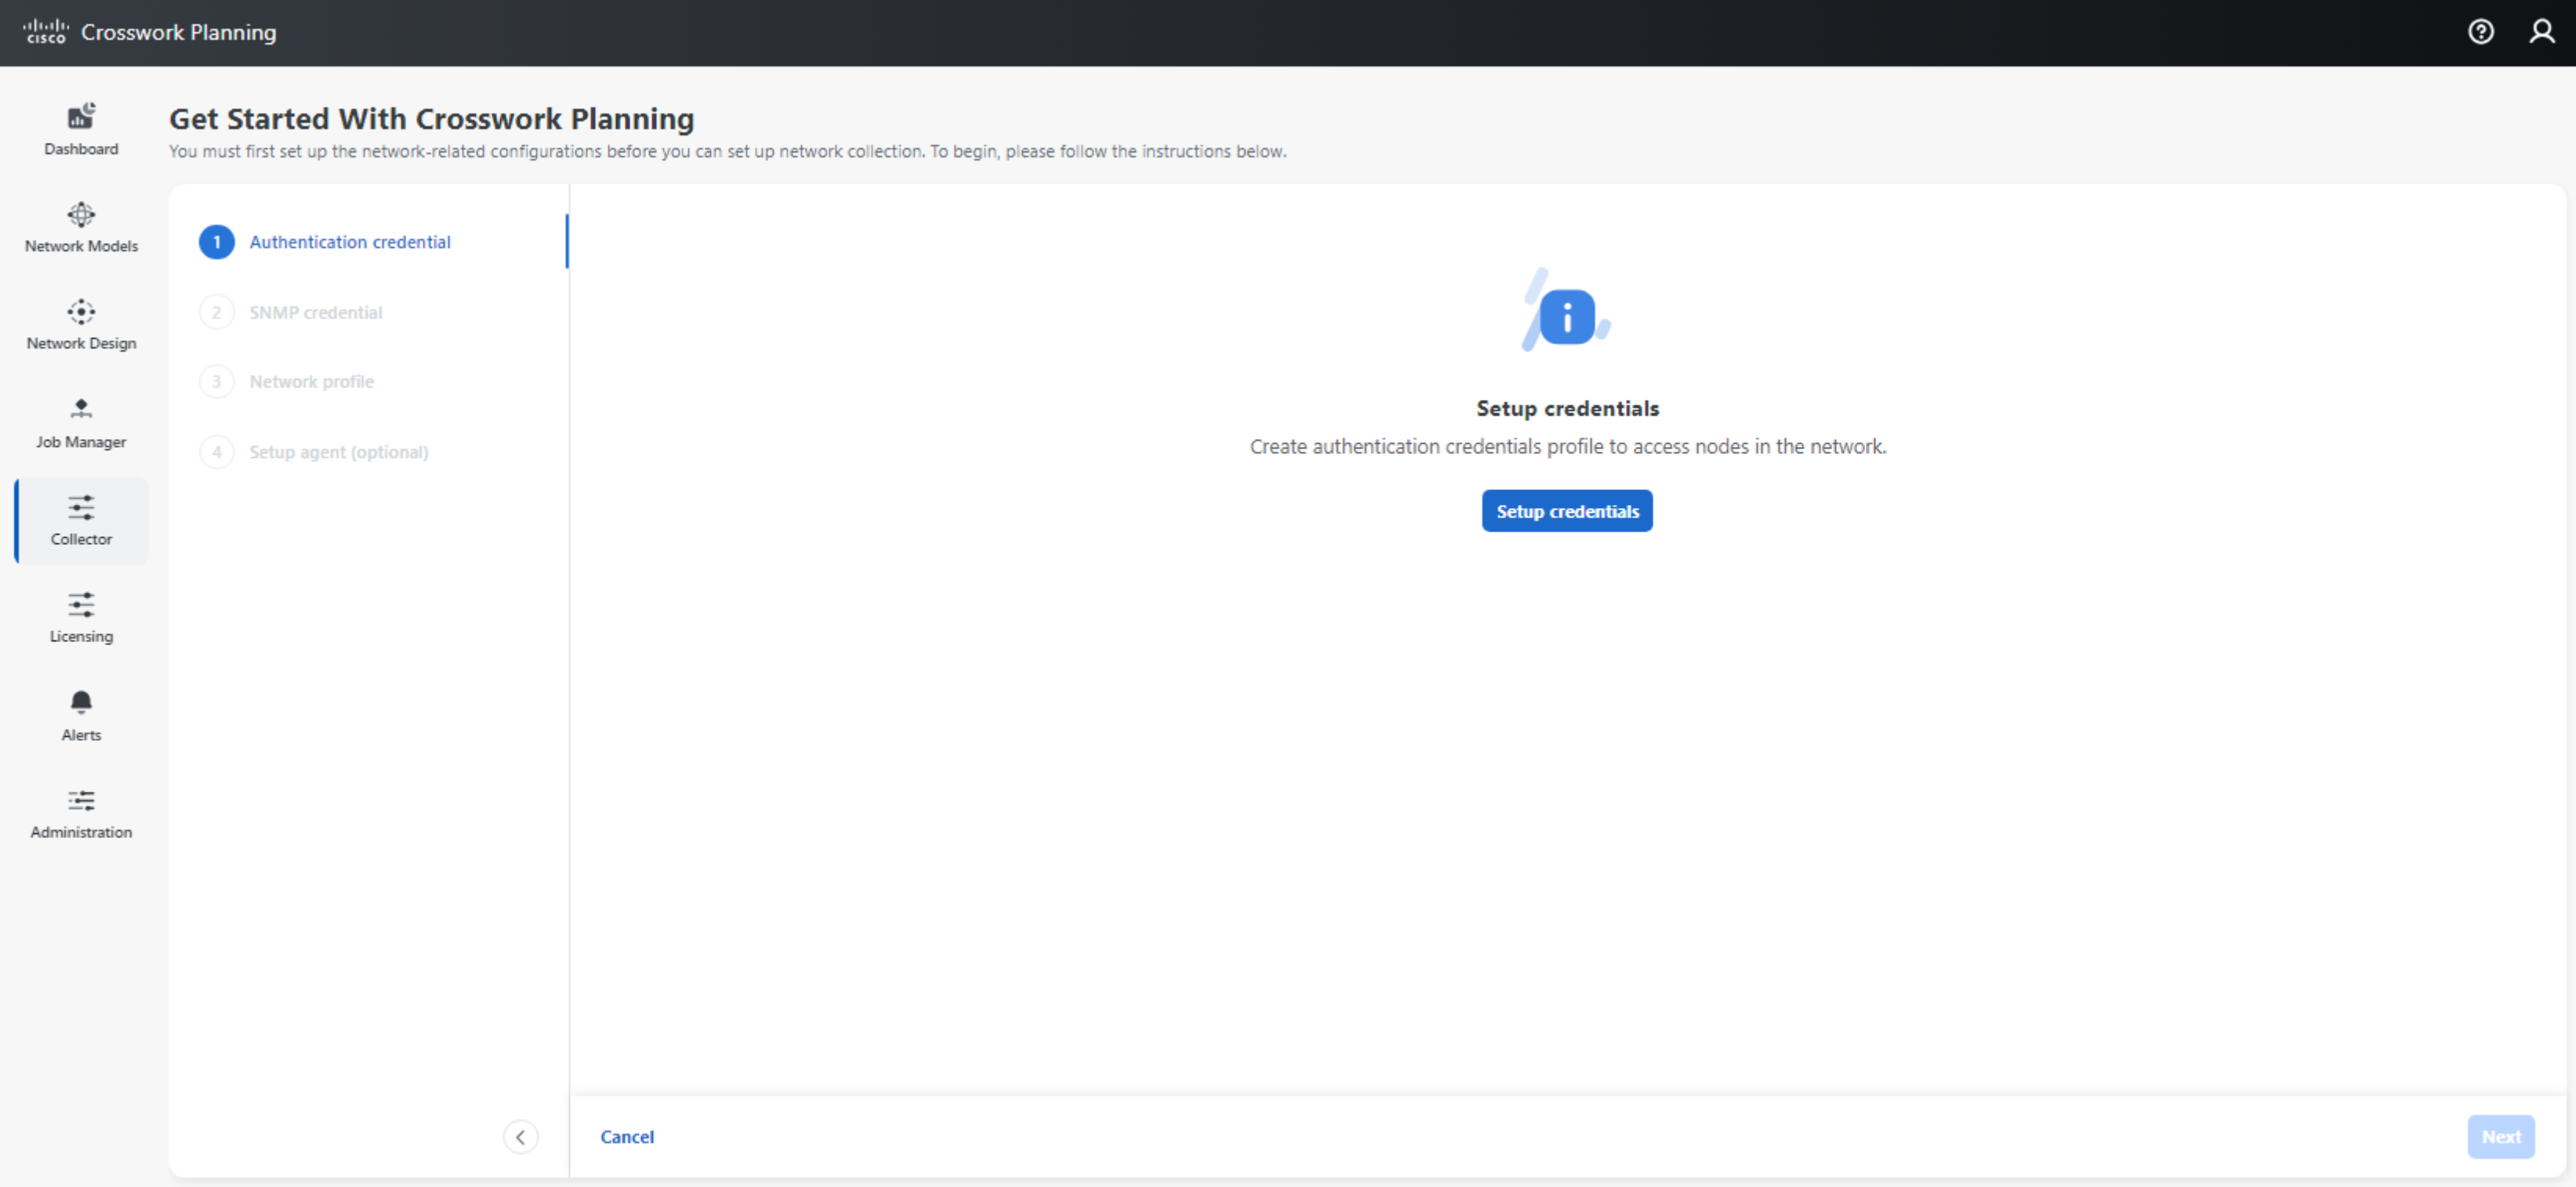
Setting up Credentials
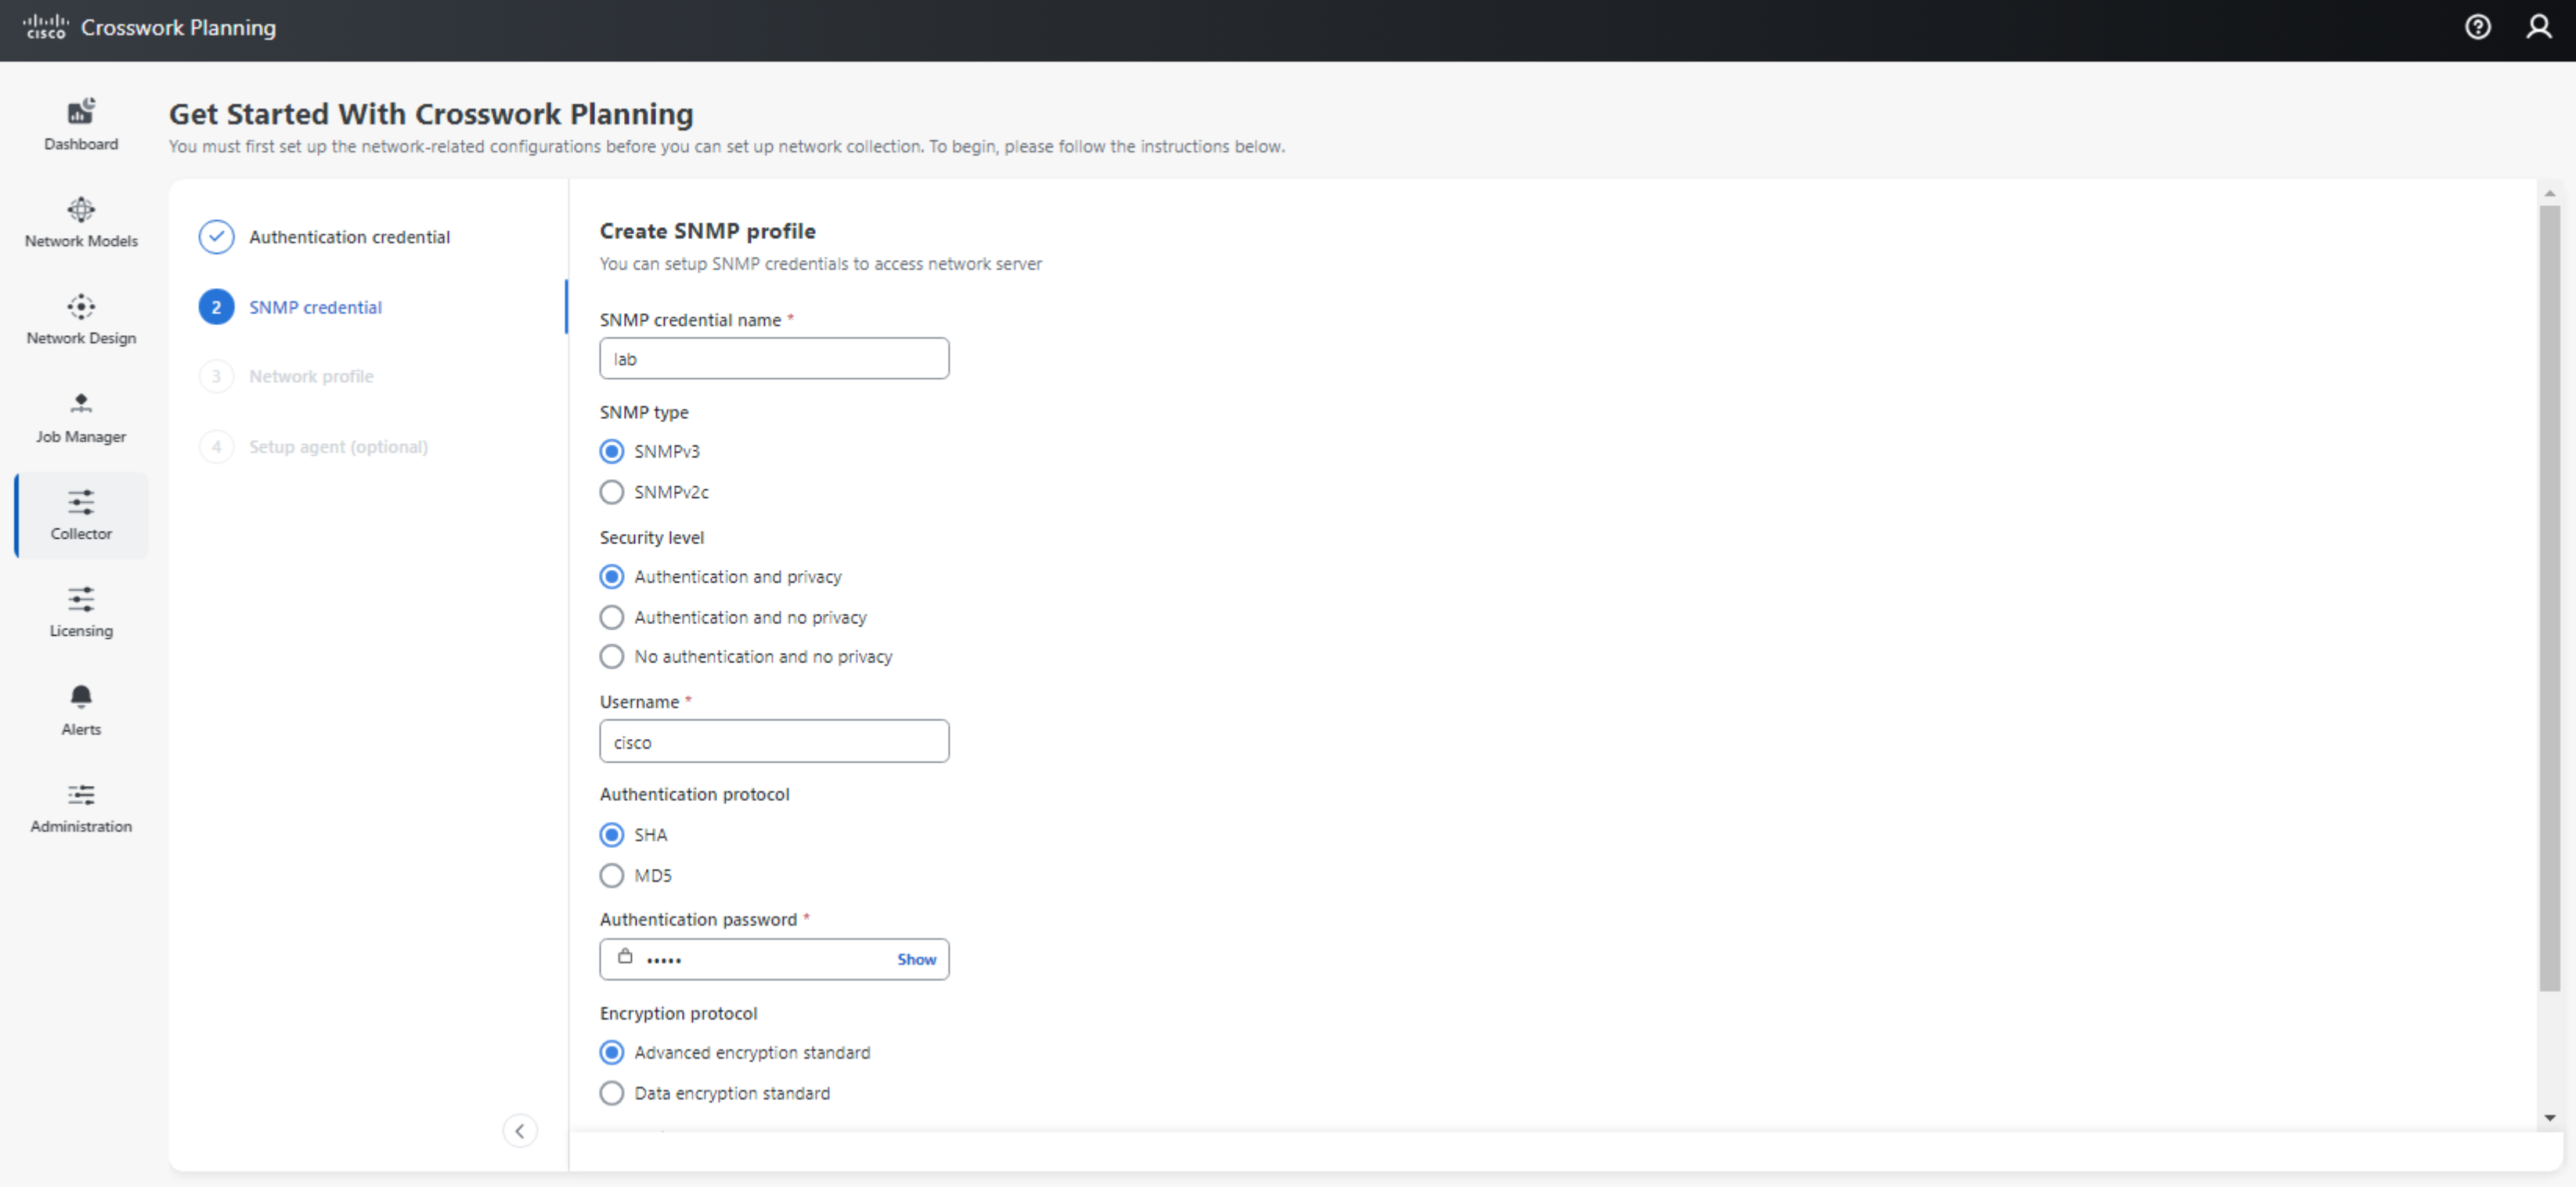
Credential profiles must be set up for Crosswork Planning to connect to network devices for collection. There are two profiles,
- Authentication Profile - Contains the user credentials (username and password) which the Collector will use when connecting to the network devices. Authentication Profiles are used for collection methods which require device login, e.g. IGP based topology discovery where Crosswork Planning will login to the device to collect the IGP database

- SNMP Profile - Contains the SNMP type (v2c, v3) and credentials for connecting to the network devices. SNMP is used to enrich the topology information collected via IGP or SR-PCE (e.g. interface name and interface description). In addition, SNMP is used used by some collection methods such as SNMP based LSP collection and interface traffic collection.
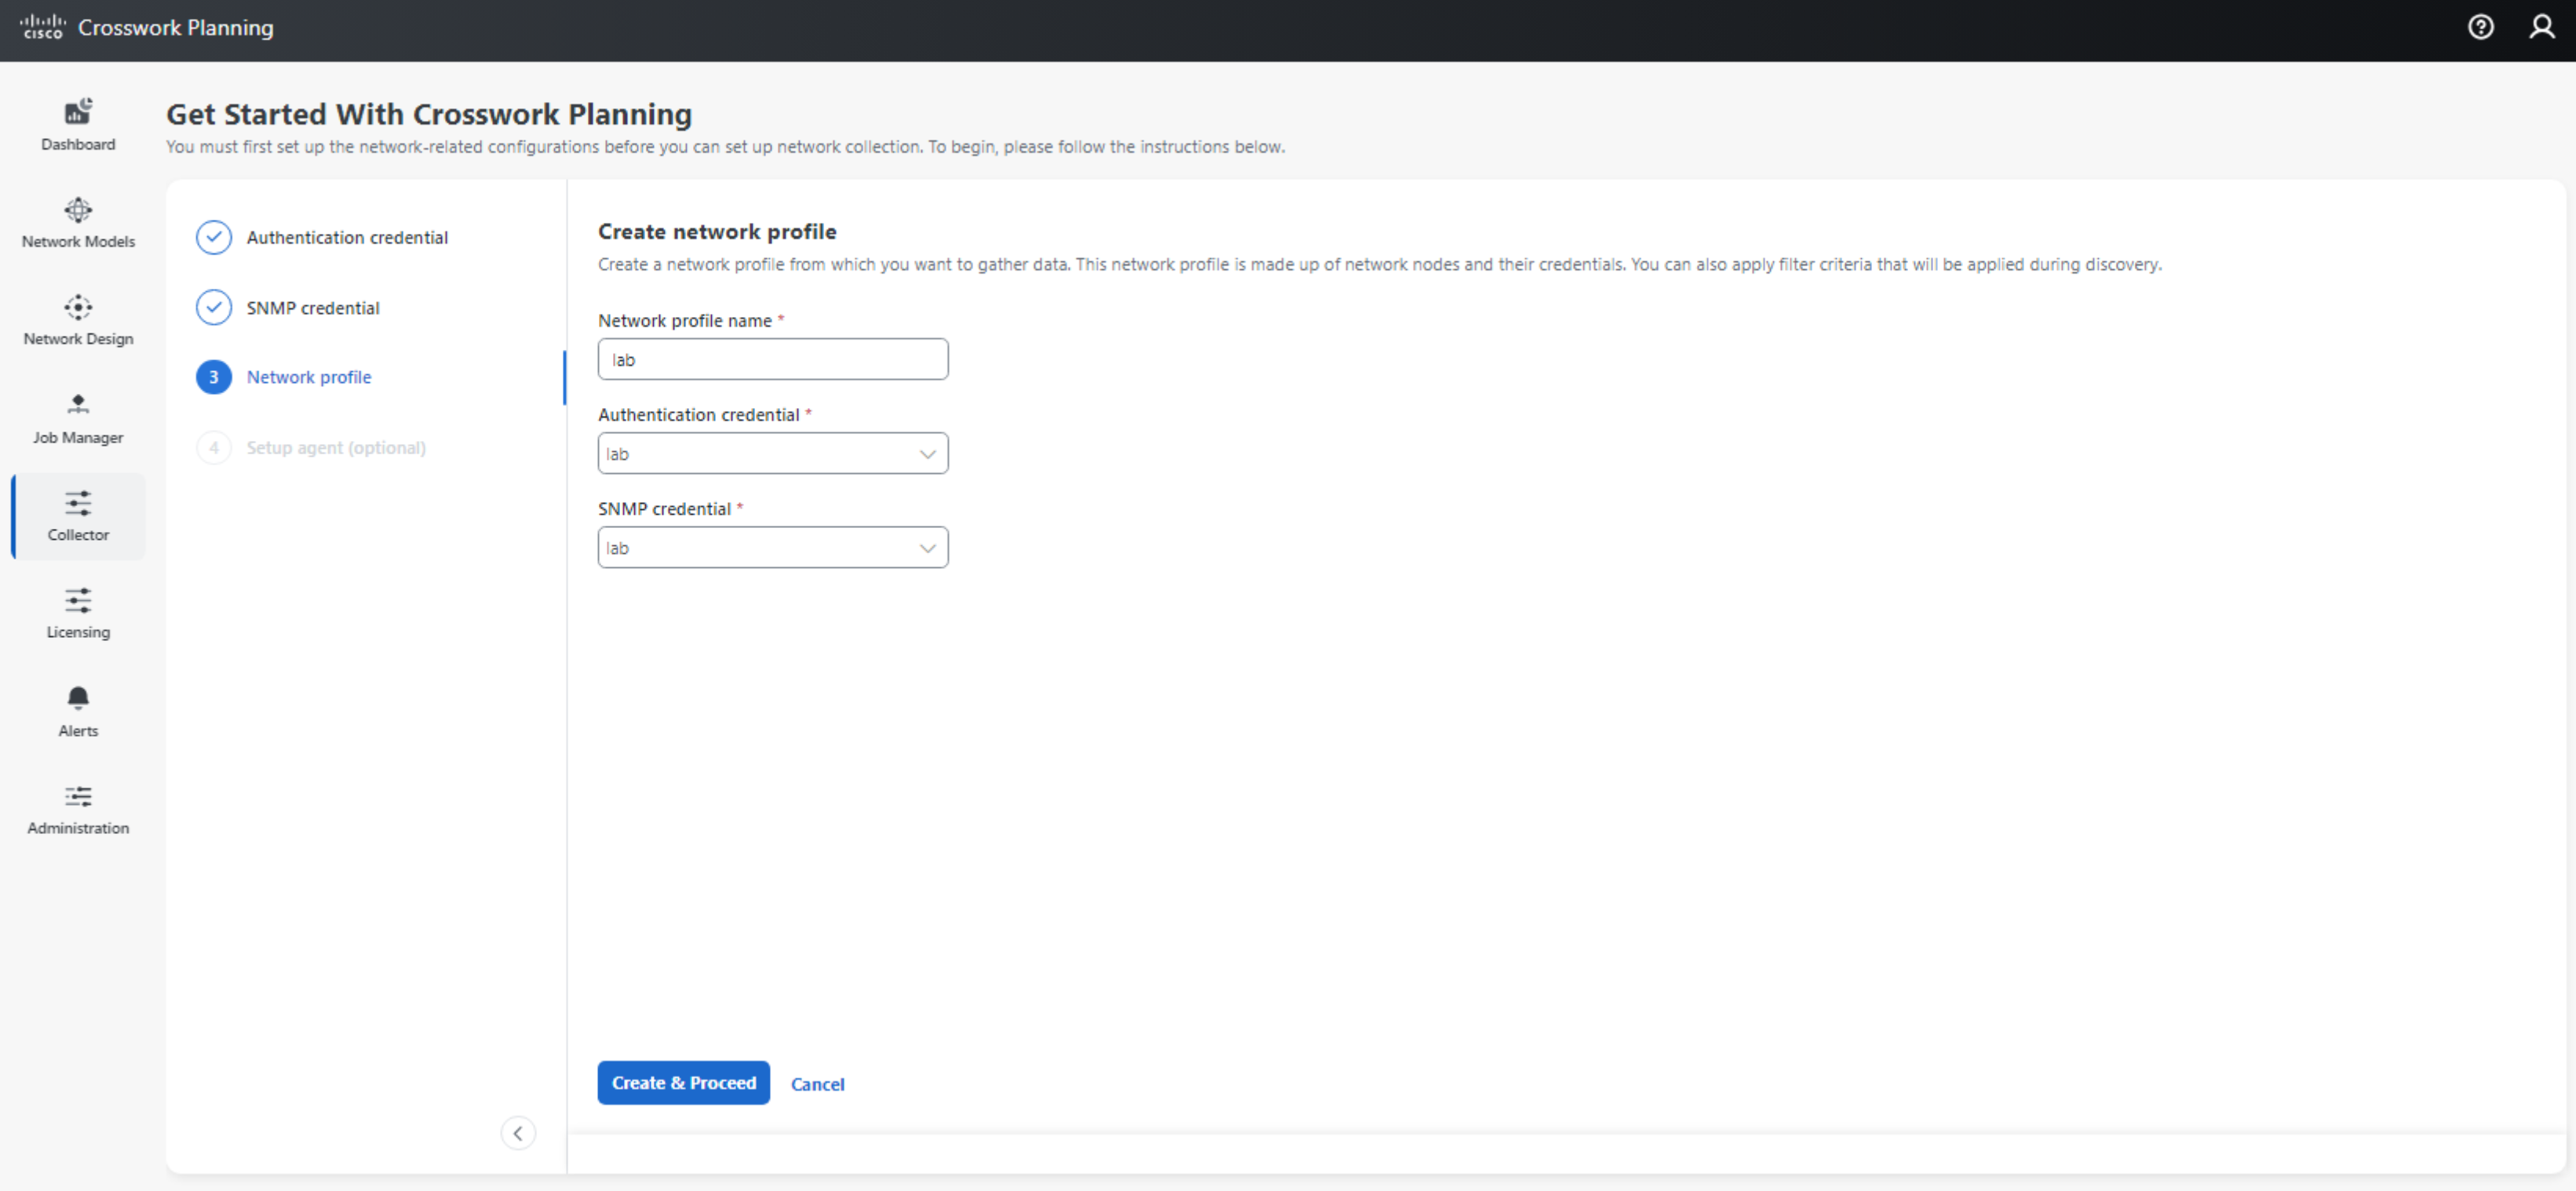
Setting up Network Profile
The creation of network profiles allows us to specify the authentication and SNMP profile used to access network devices. A Node list may be created to identify the Management IP, SNMP profile, and Authentication profile associated with a particular Node IP address. Specifying the Management IP is especially important if the Node IP, which is typically the Router ID or Loopback0 address, is not directly accessible from Crosswork Planning.
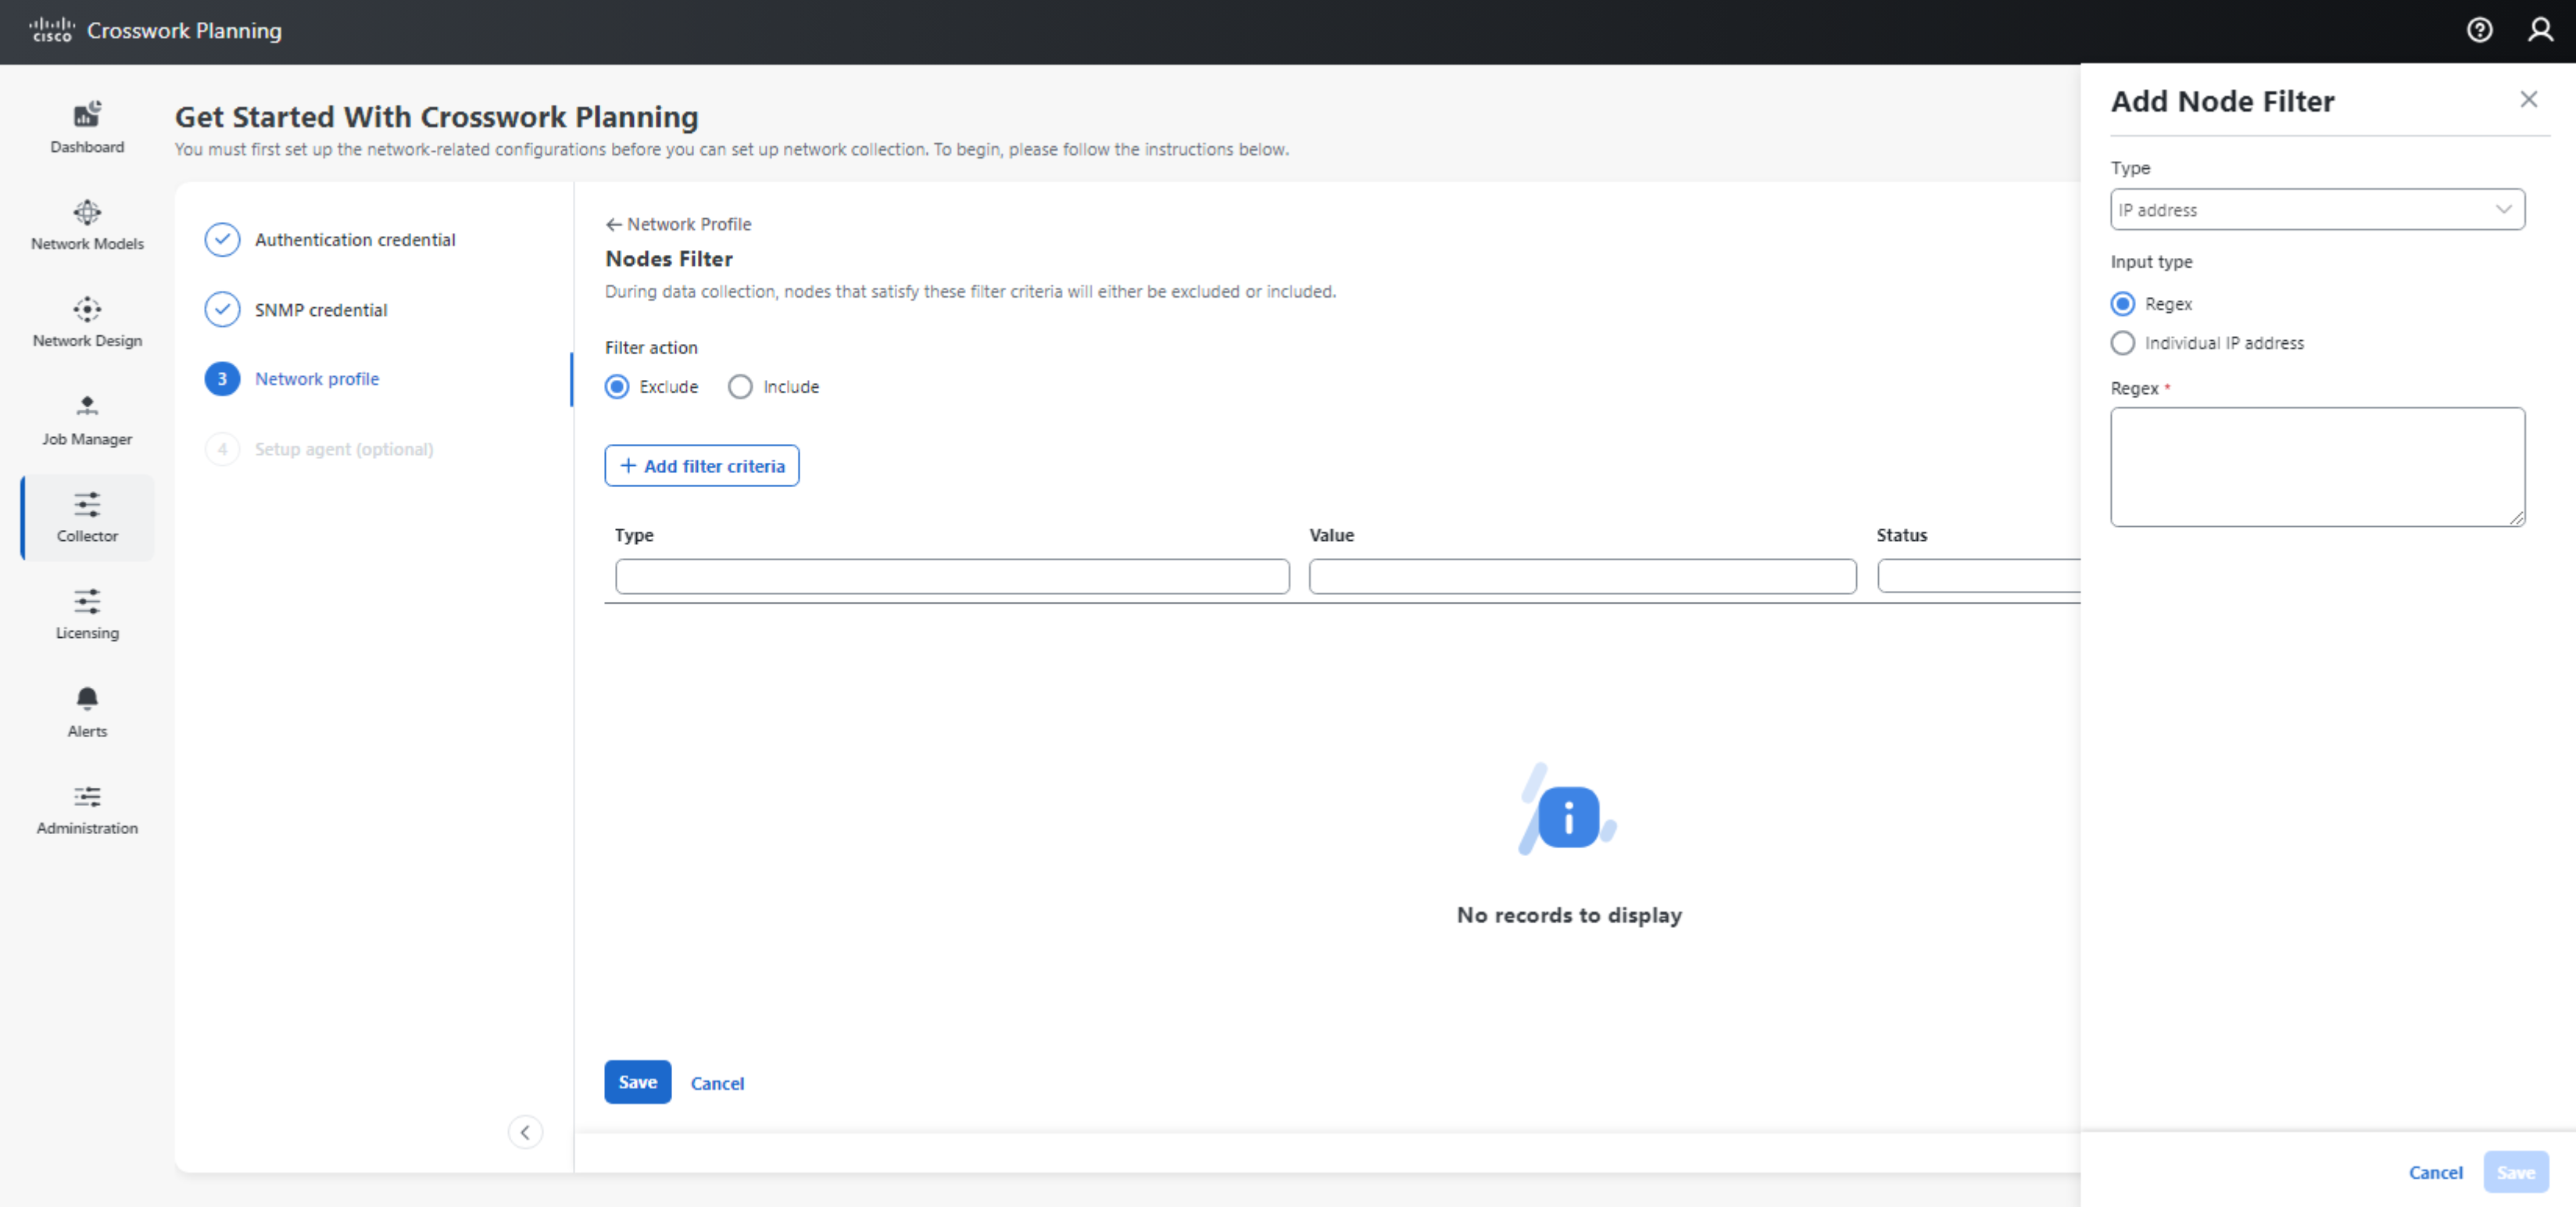
In addition, Node filter may be used to restrict the collection scope to certain nodes only. This may be specified using an include or exclude list based on regular expressions or individual IP addresses.
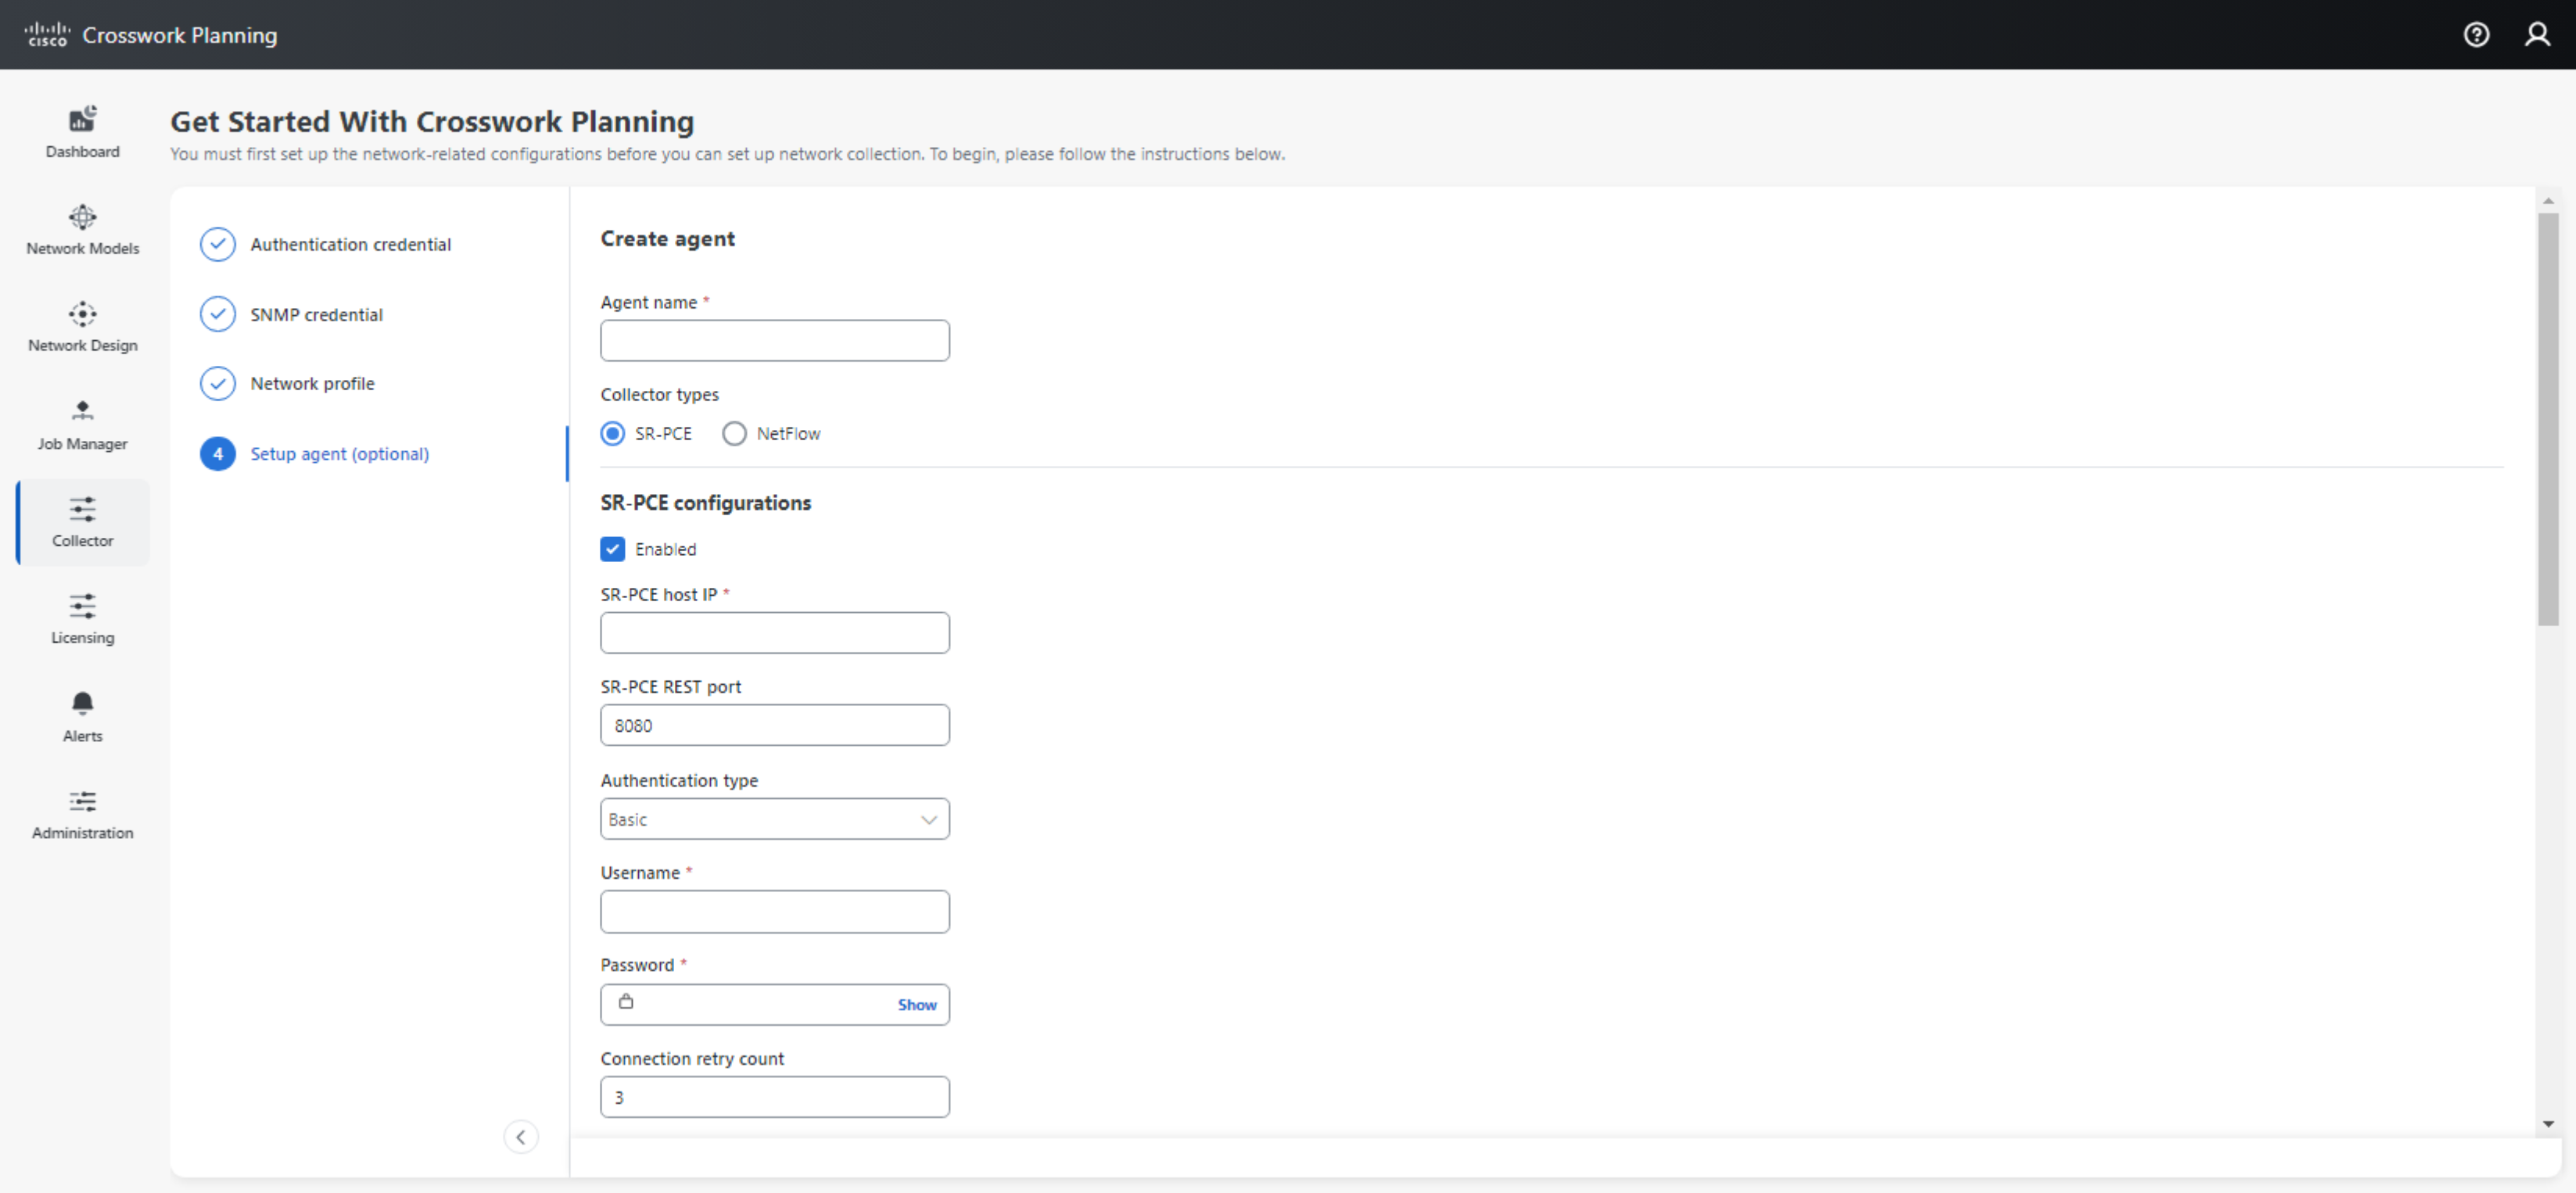
Setting up Agent (Optional)
SR-PCE or Netflow agents must be set up if we are using either for collection. An agent will need to be set up per SR-PCE instance.
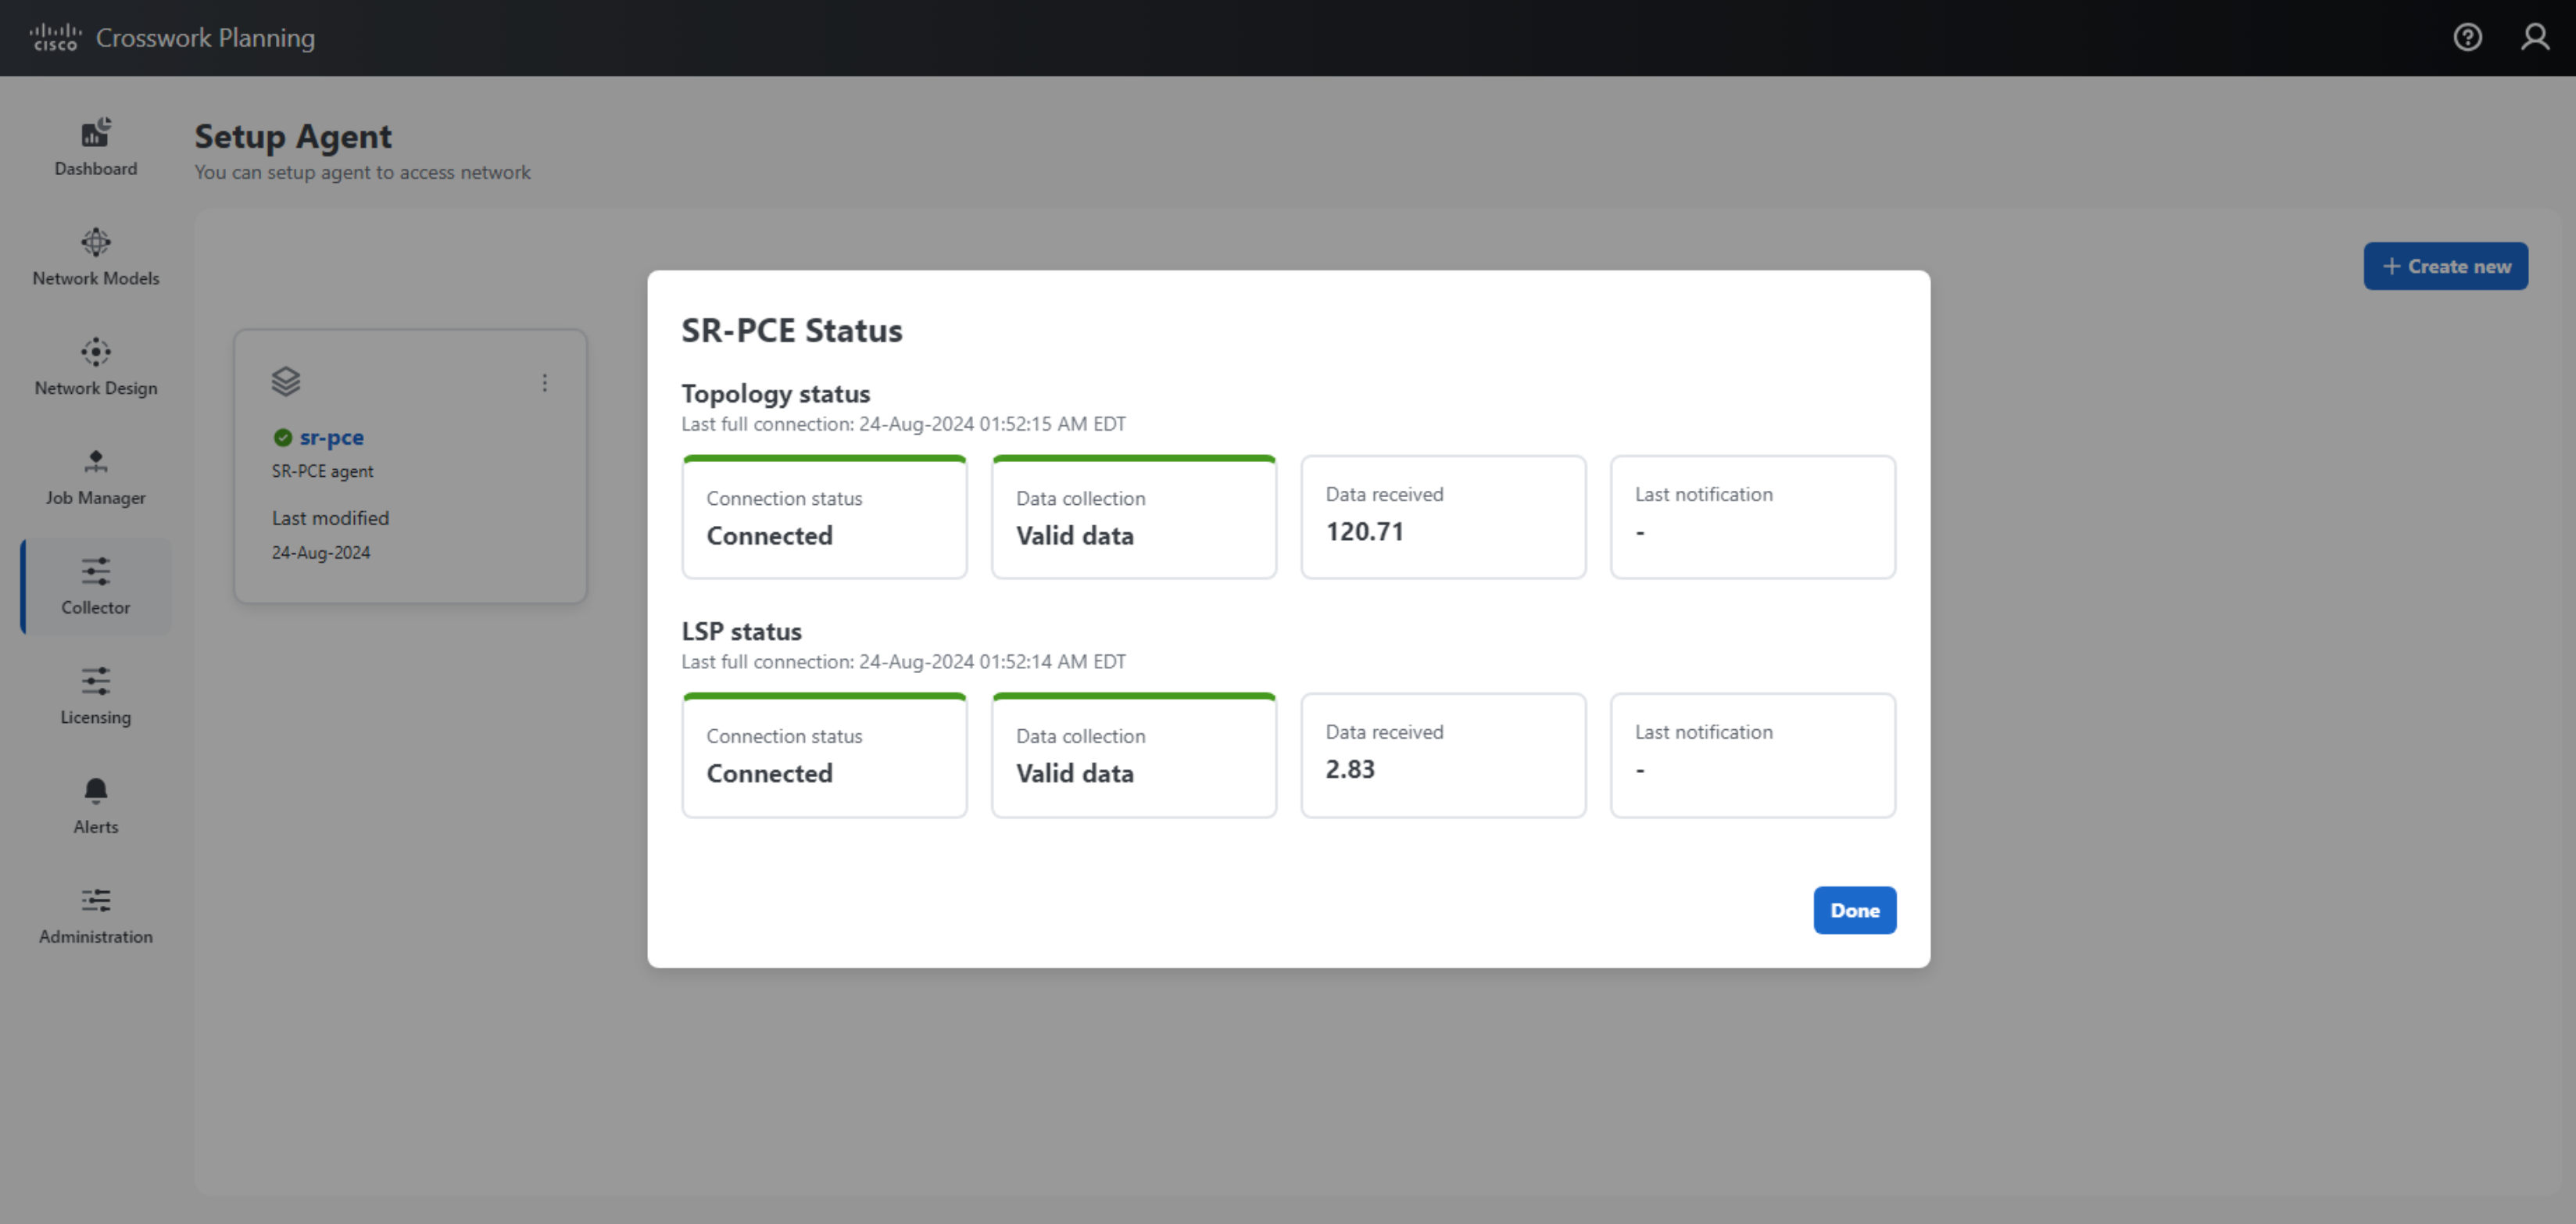
After the agent has been set up, we may verify the connectivity to the SR-PCE and if Topology and LSP collection data is valid.
Note: The abscence of LSPs may cause LSP status - Data collection to indicate Invalid data.
Setting up Collection
The next step is to set up collection by going to Collector > Collections > Add collection. Select the collection methods for Basic topology, Advanced modeling and Traffic and Demands.
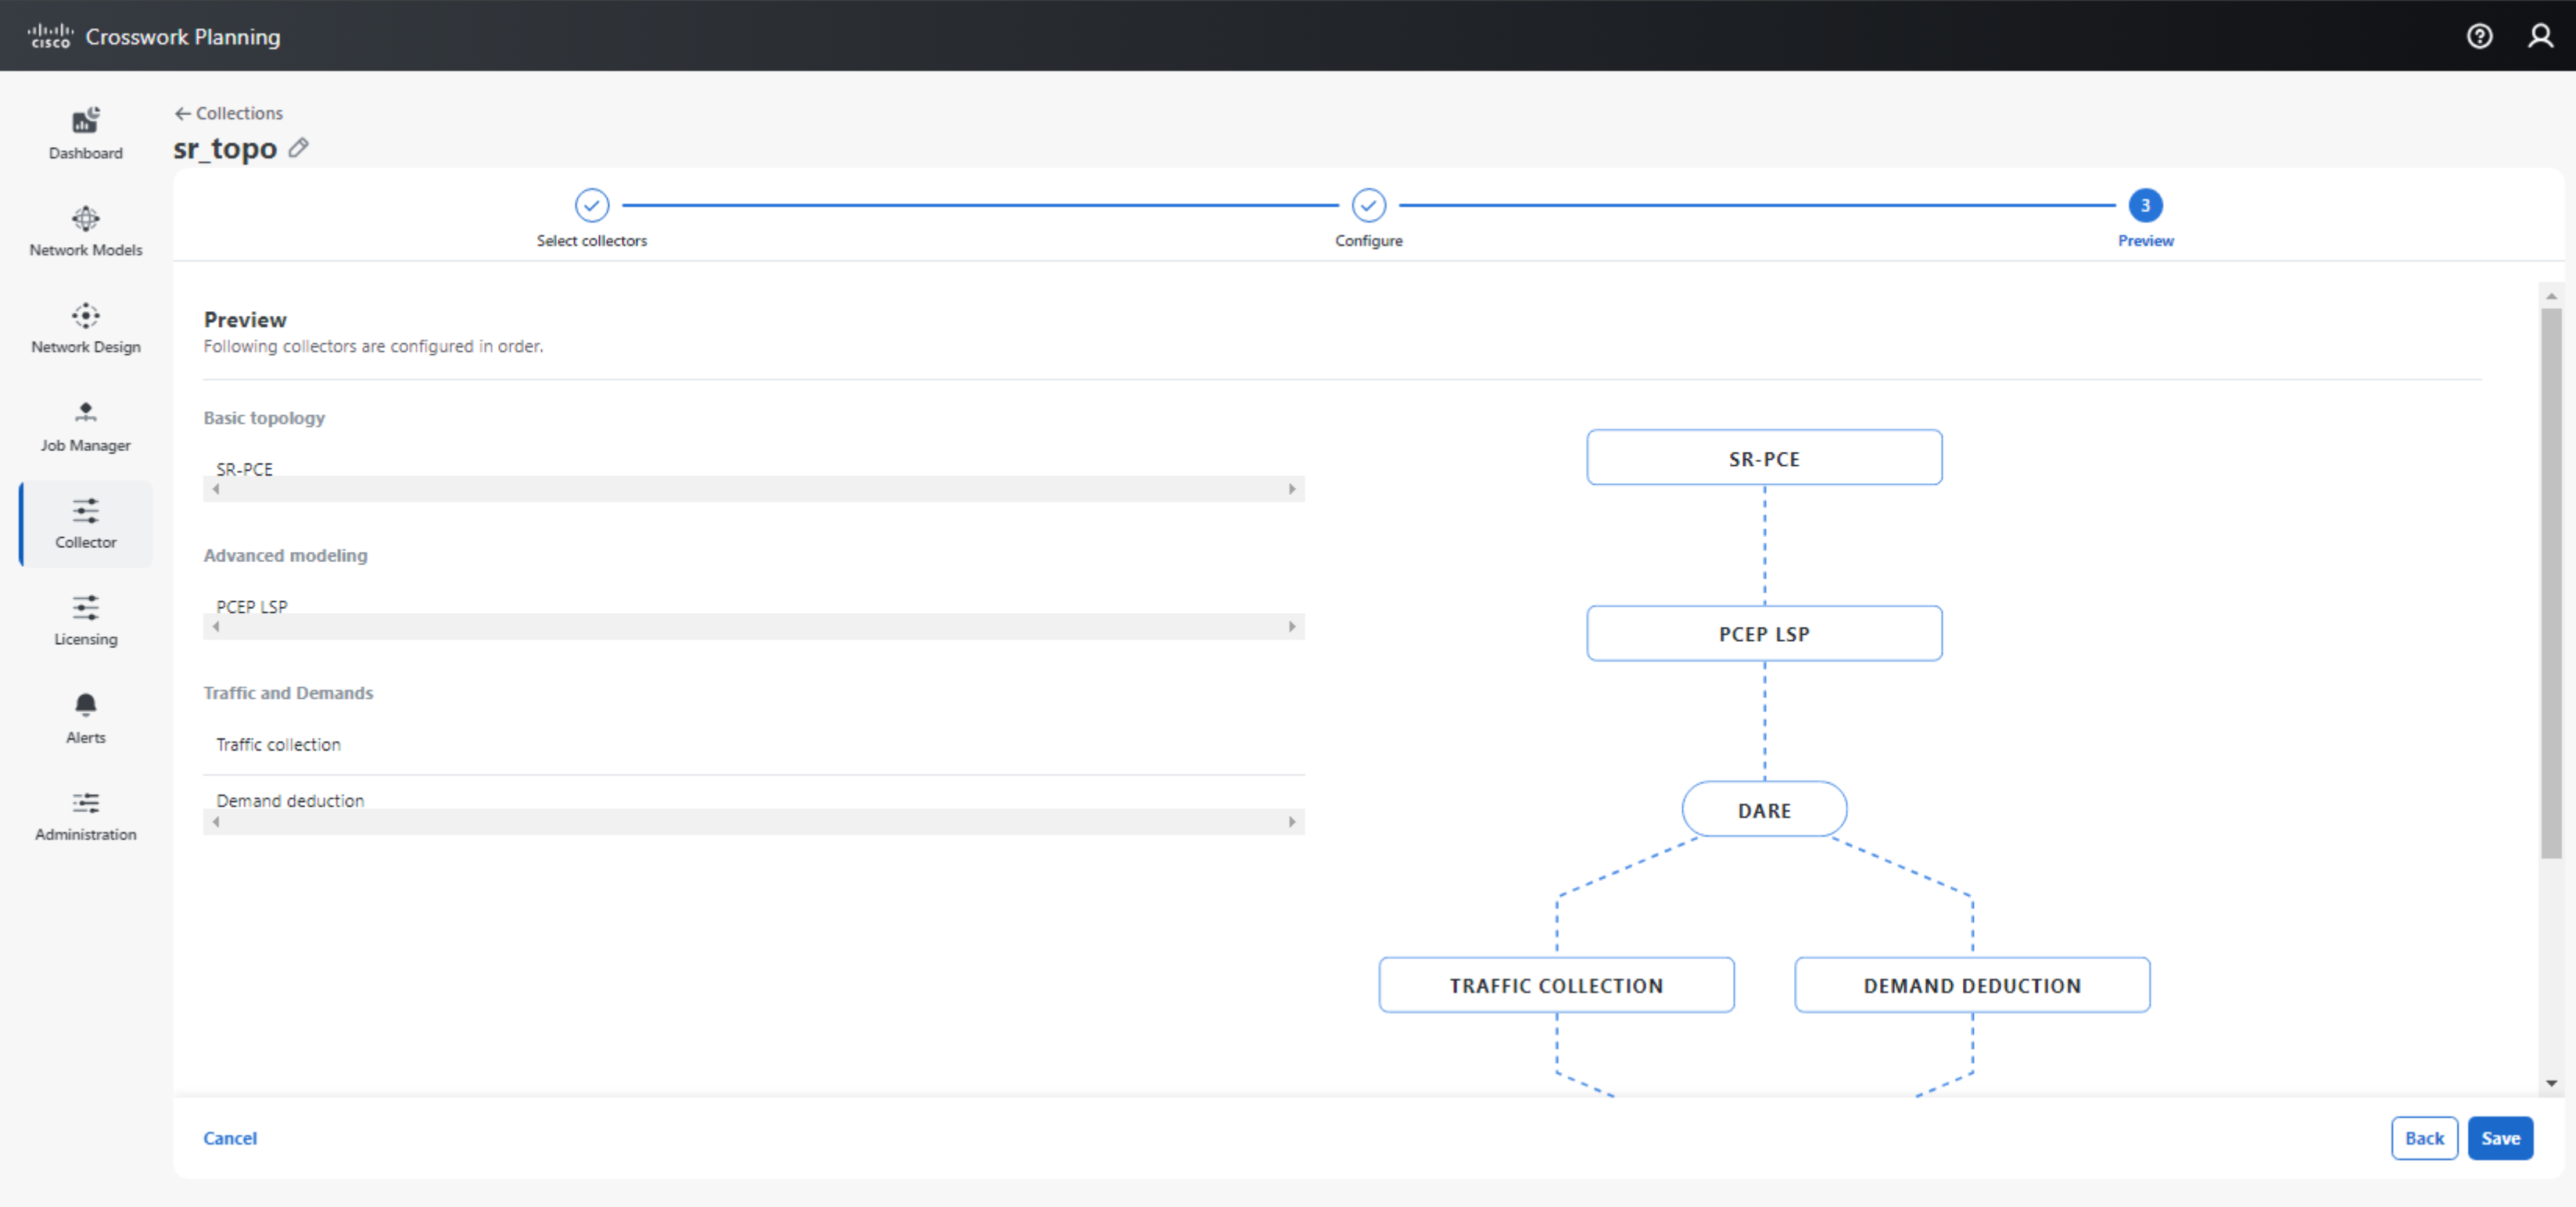
Example: SR-PCE based topology and LSP collection
SR-PCE based topology and LSP collection are usually used for Segment Routing (SR/MPLS) networks with SR-PCEs deployed. In the example below, we select SR-PCE for basic topology collection and PCEP LSP for discovering LSPs using SR-PCE. In addition, we have enabled Traffic collection for Crosswork Planning to populate the interface and LSP traffic statistics.
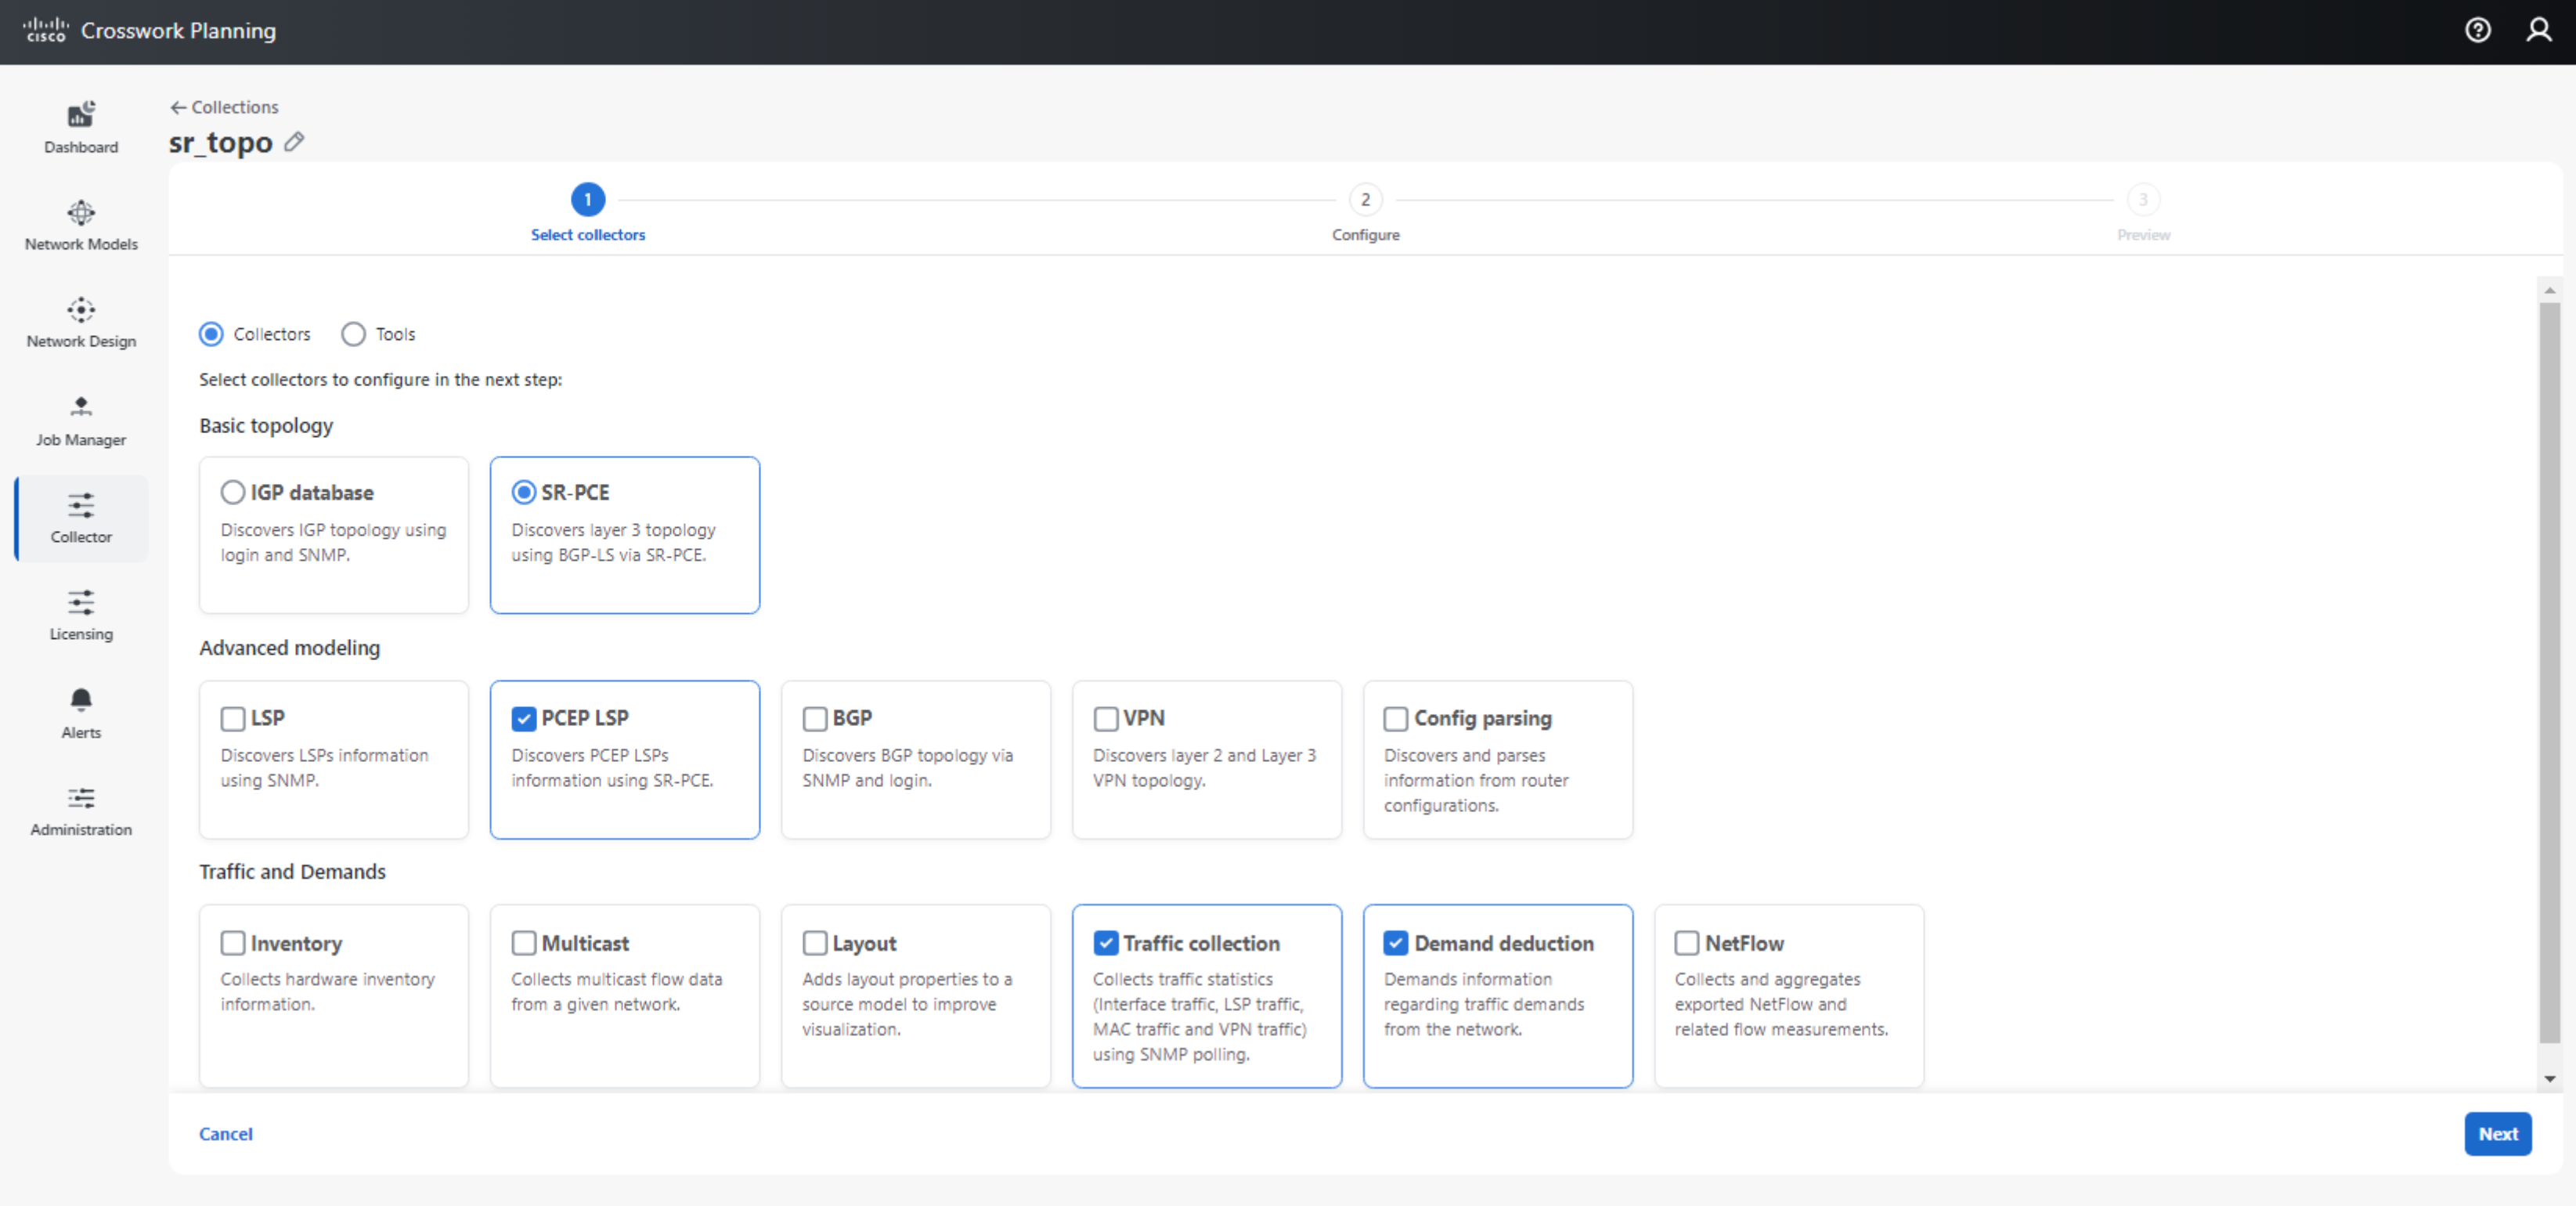
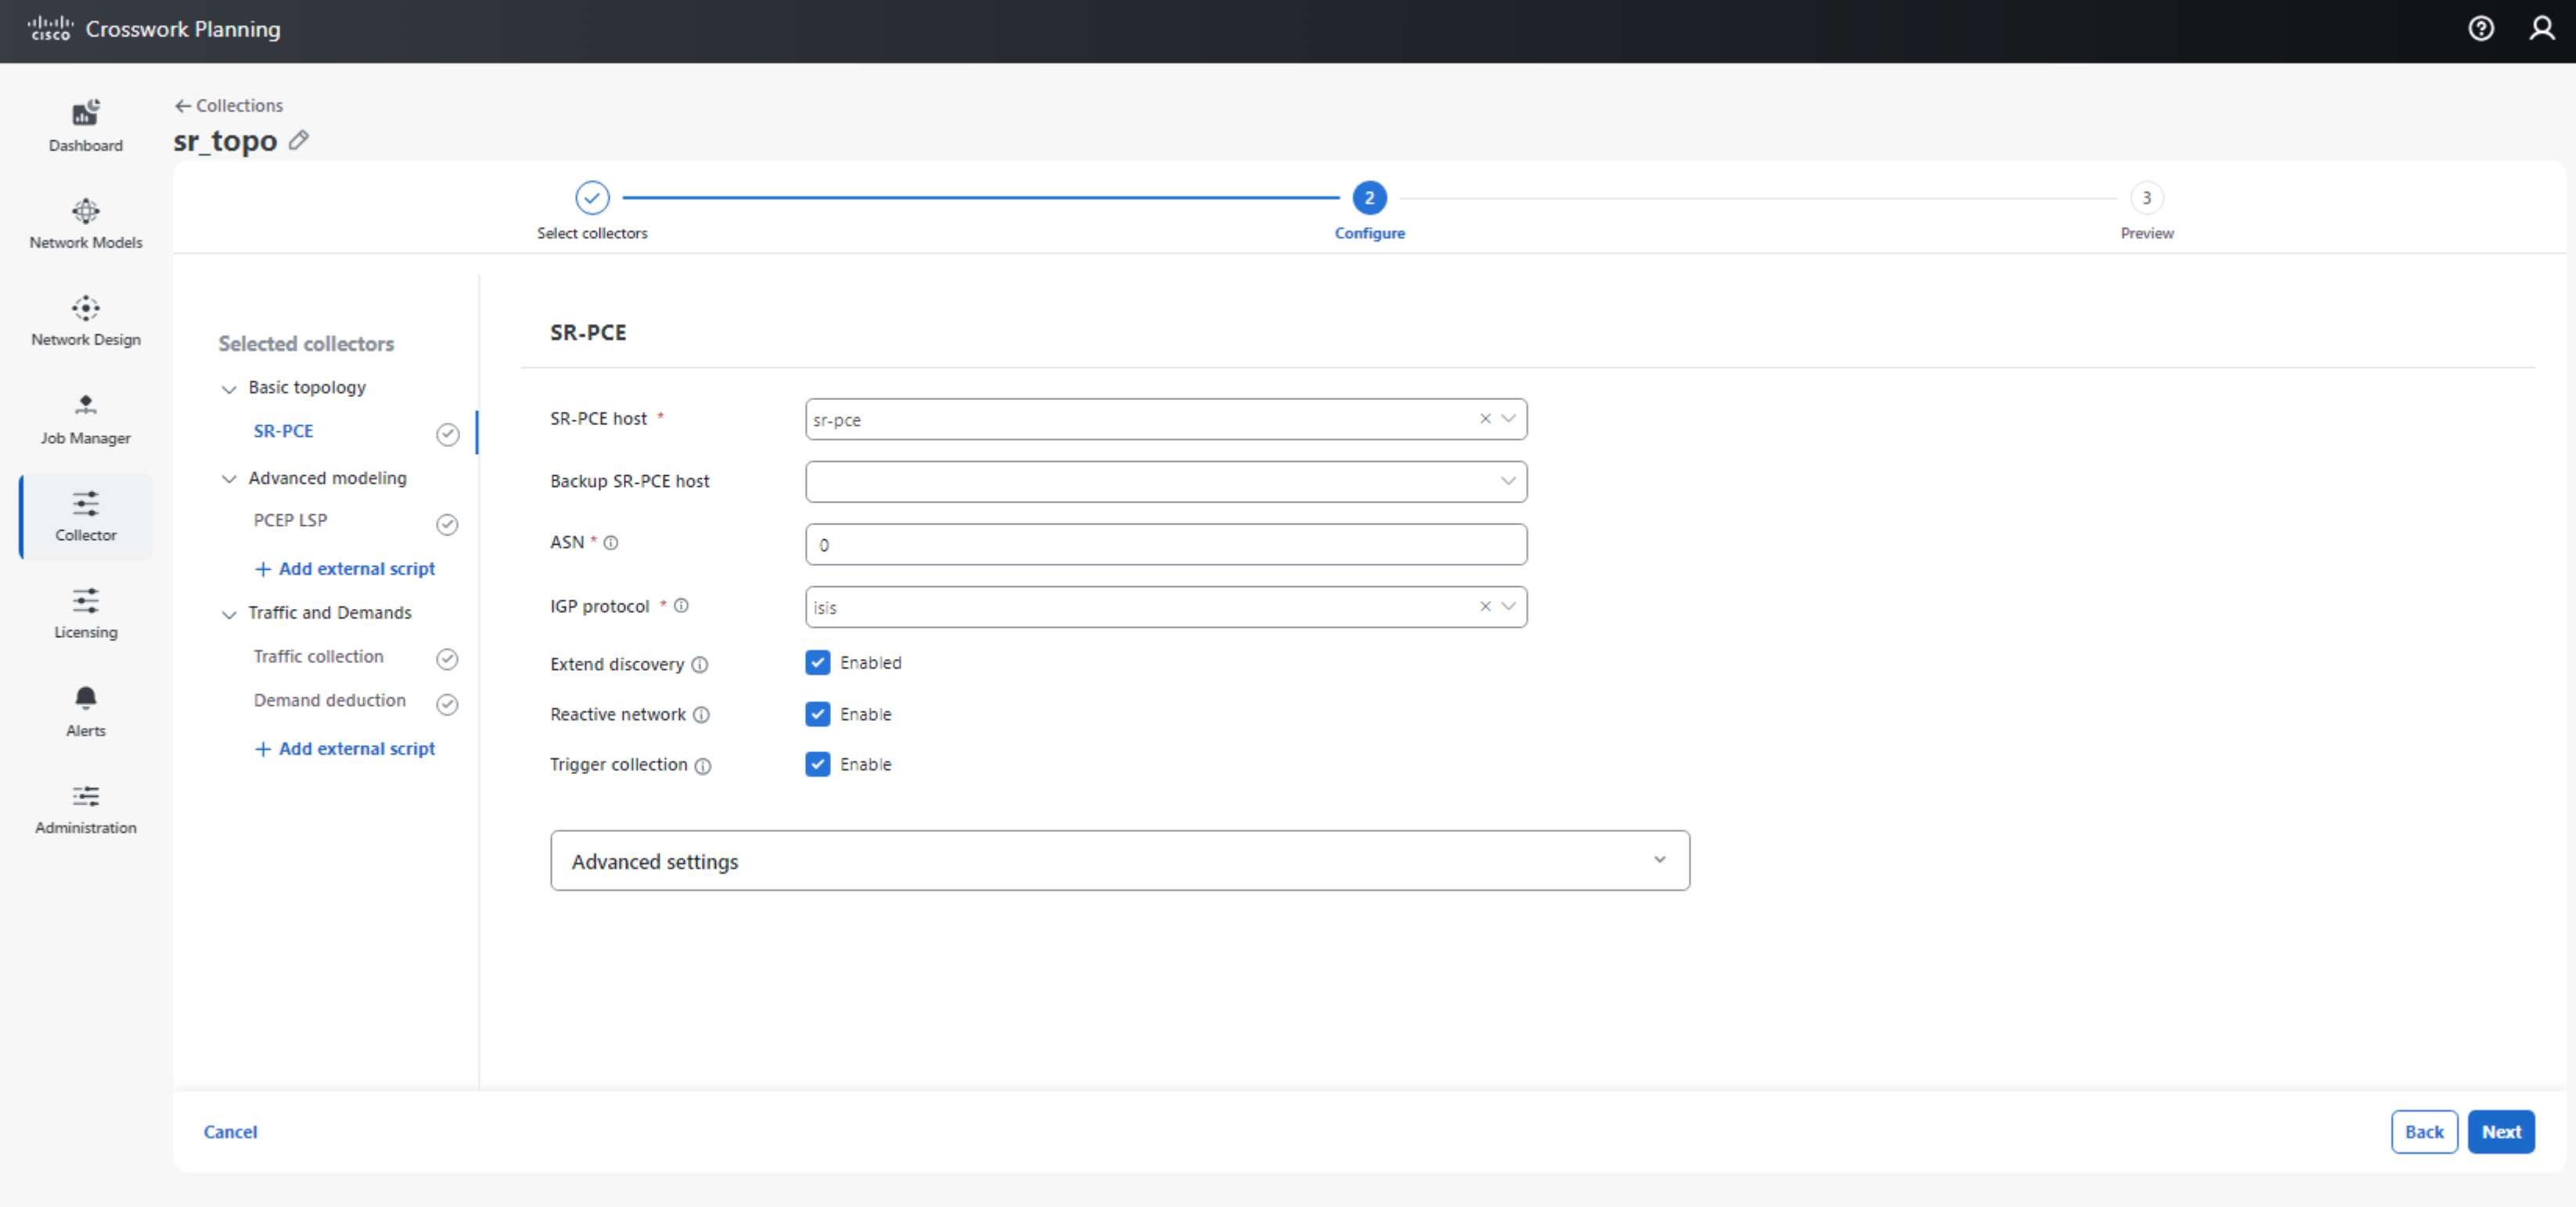
For SR-PCE based topology and LSP collection, we need to ensure that the mandatory parameters have been entered under the SR-PCE, PCEP LSP, and Traffic collection subsections.
Note that for Traffic collection, the source should be configured to use DARE - Aggregated Output, since the DARE Aggregator combines the information collected for both topology and LSPs collected via SR-PCE.
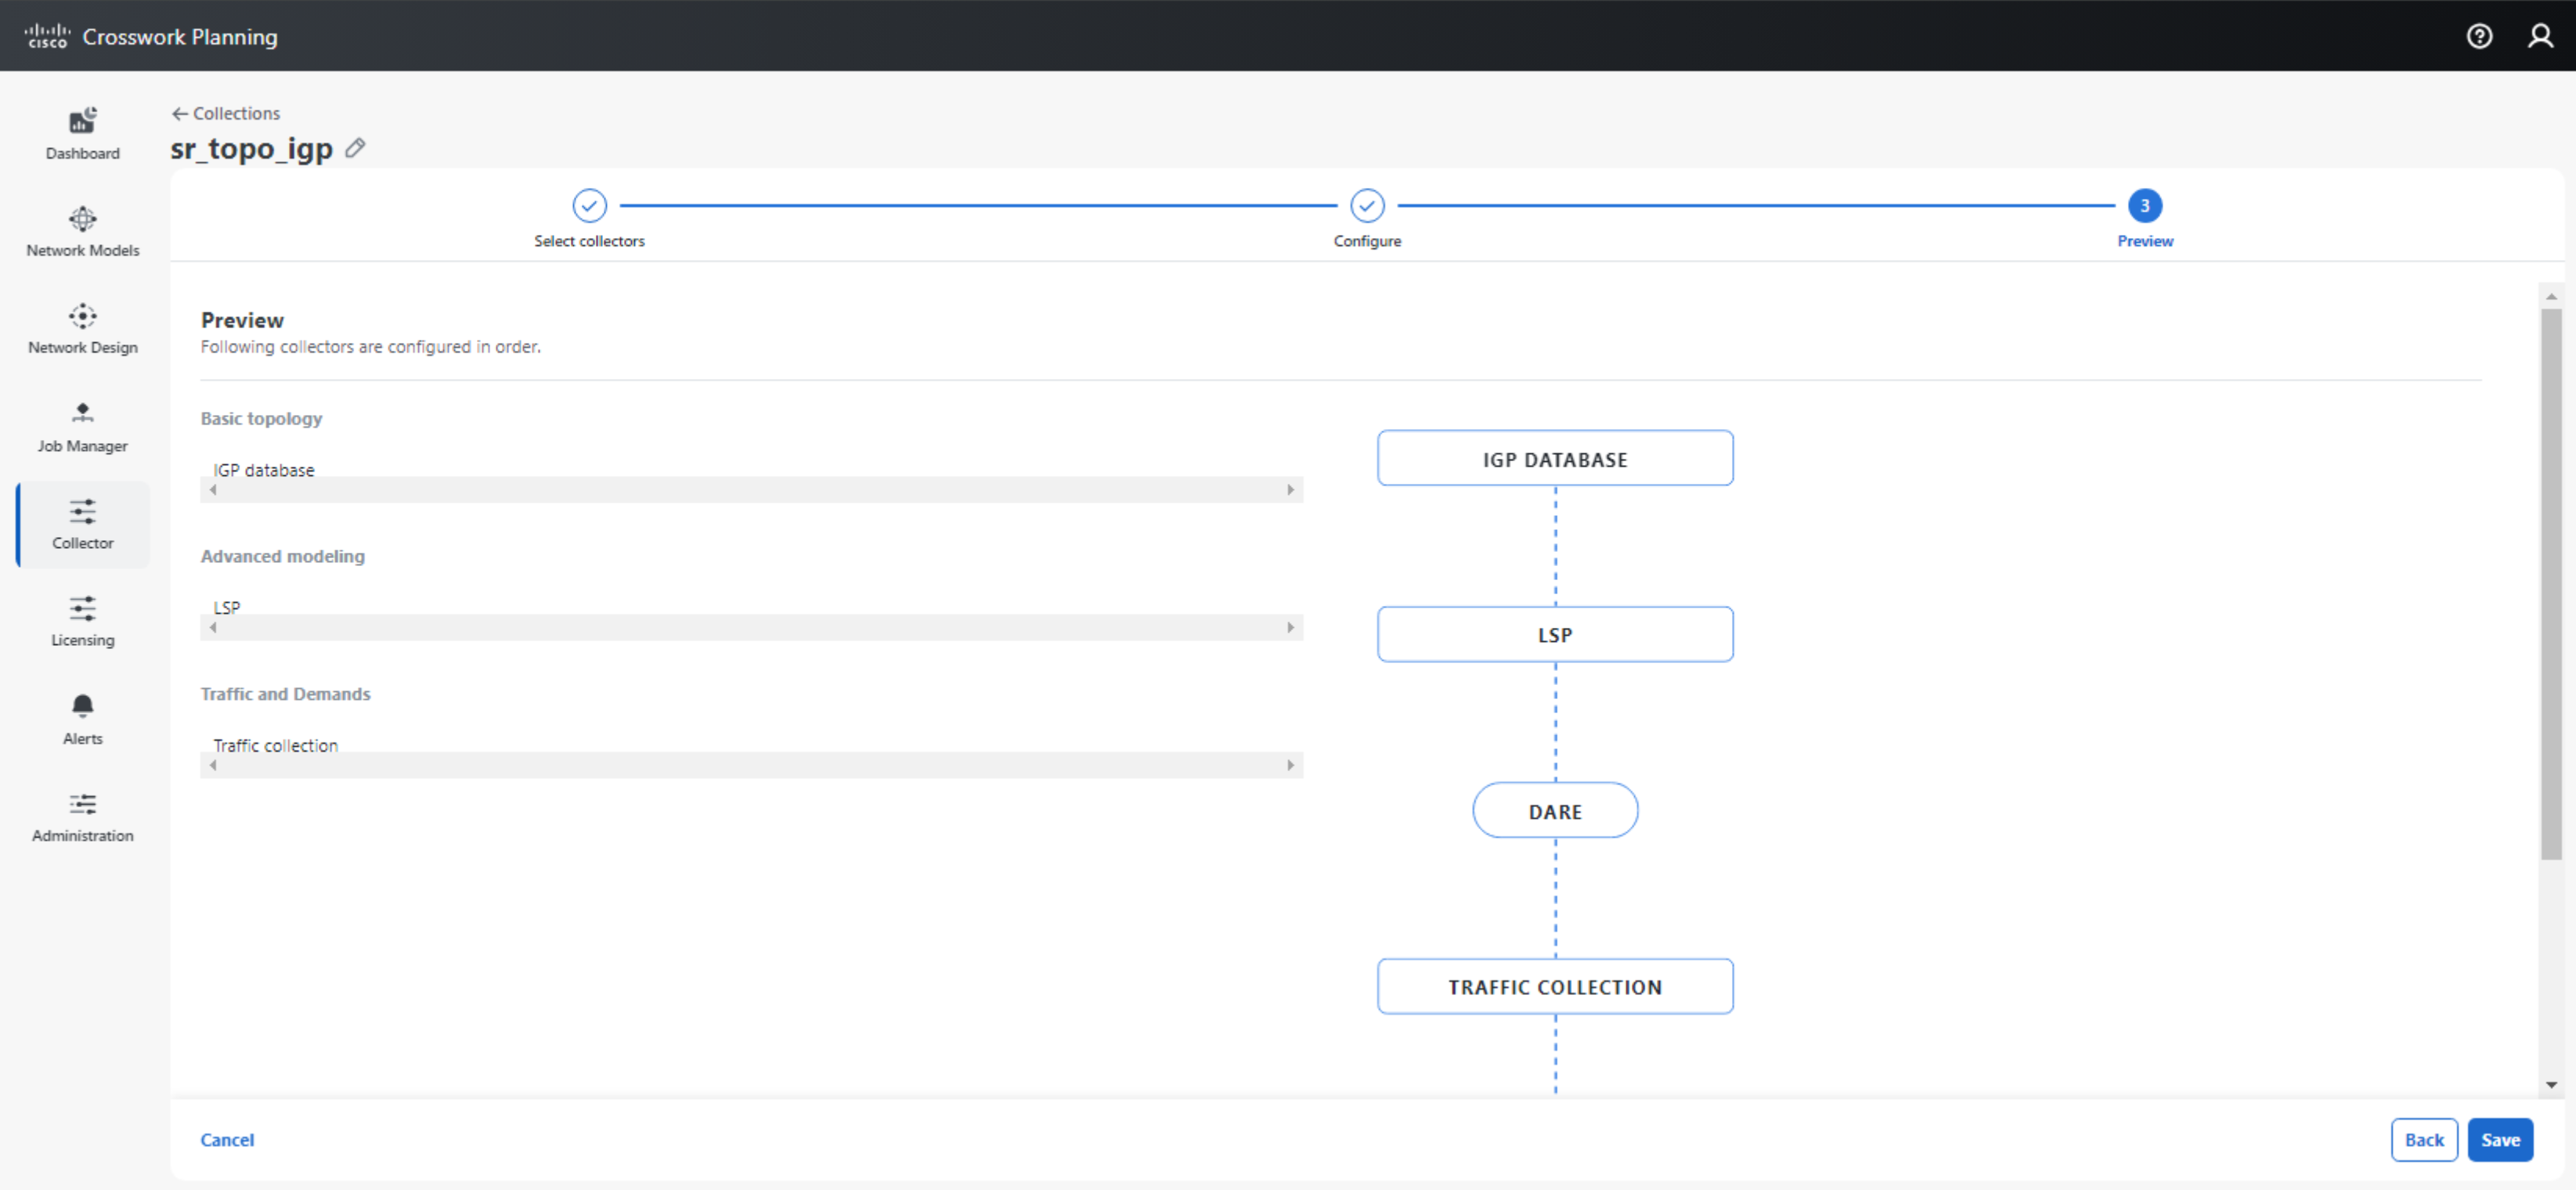
Example: IGP based topology and SNMP based LSP collection
This collection method is usually used for IP transit, or IP/MPLS networks without the SR-PCE deployed.

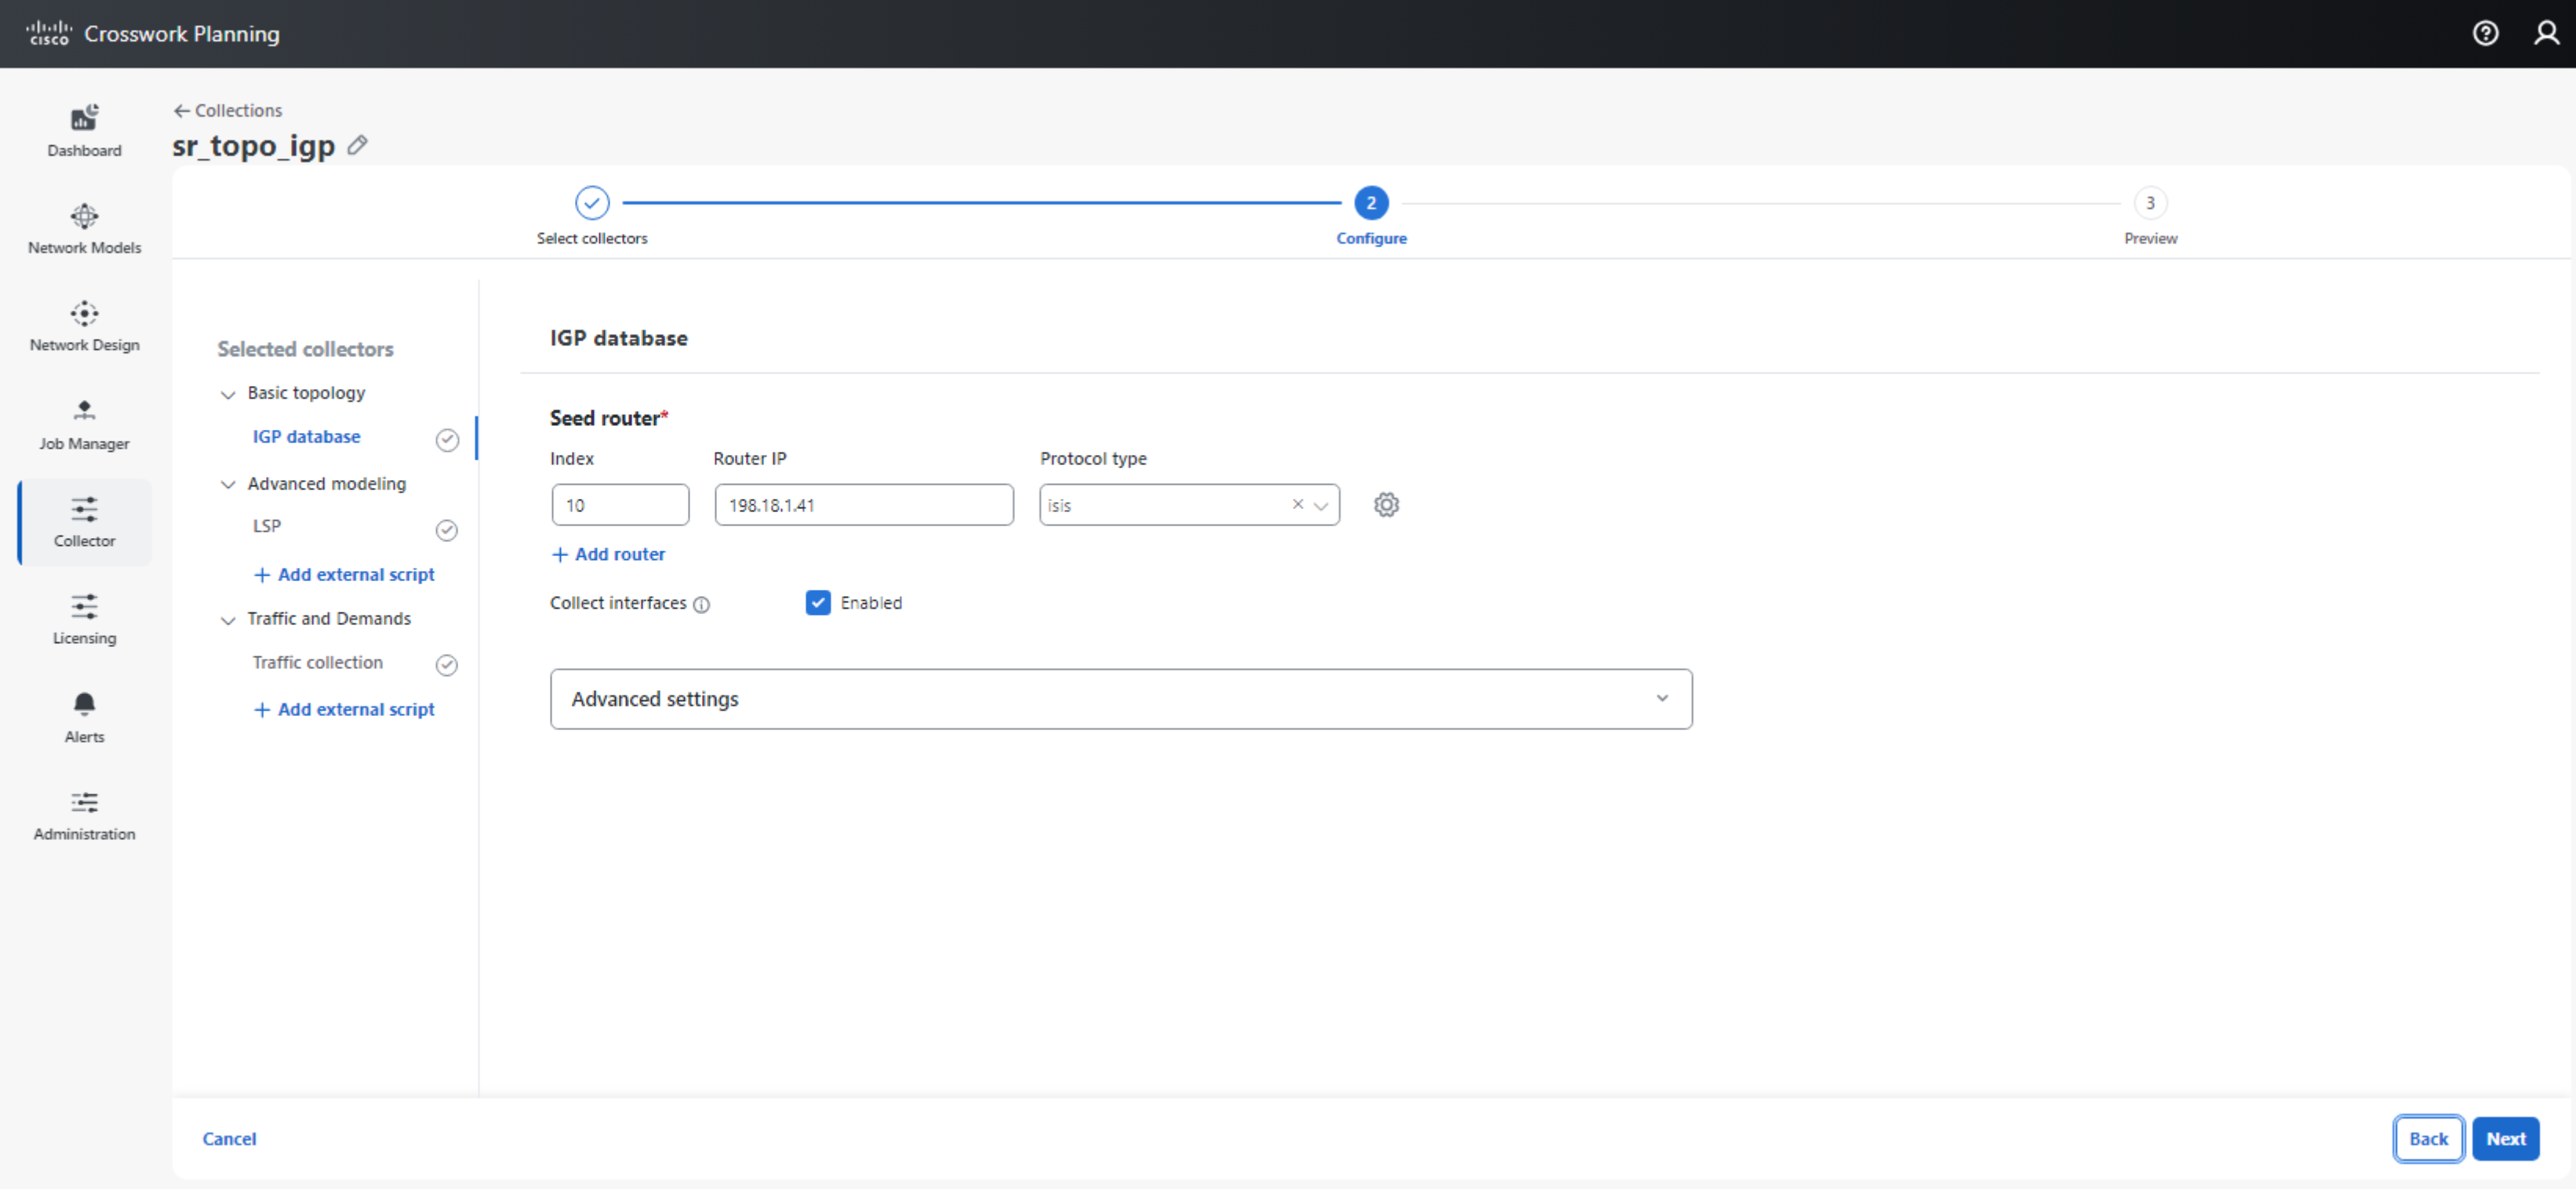
Similar to the above for SR-PCE based collection, we need to ensure that the mandatory parameters have been entered under the IGP database, LSP and Traffic collection subsections.
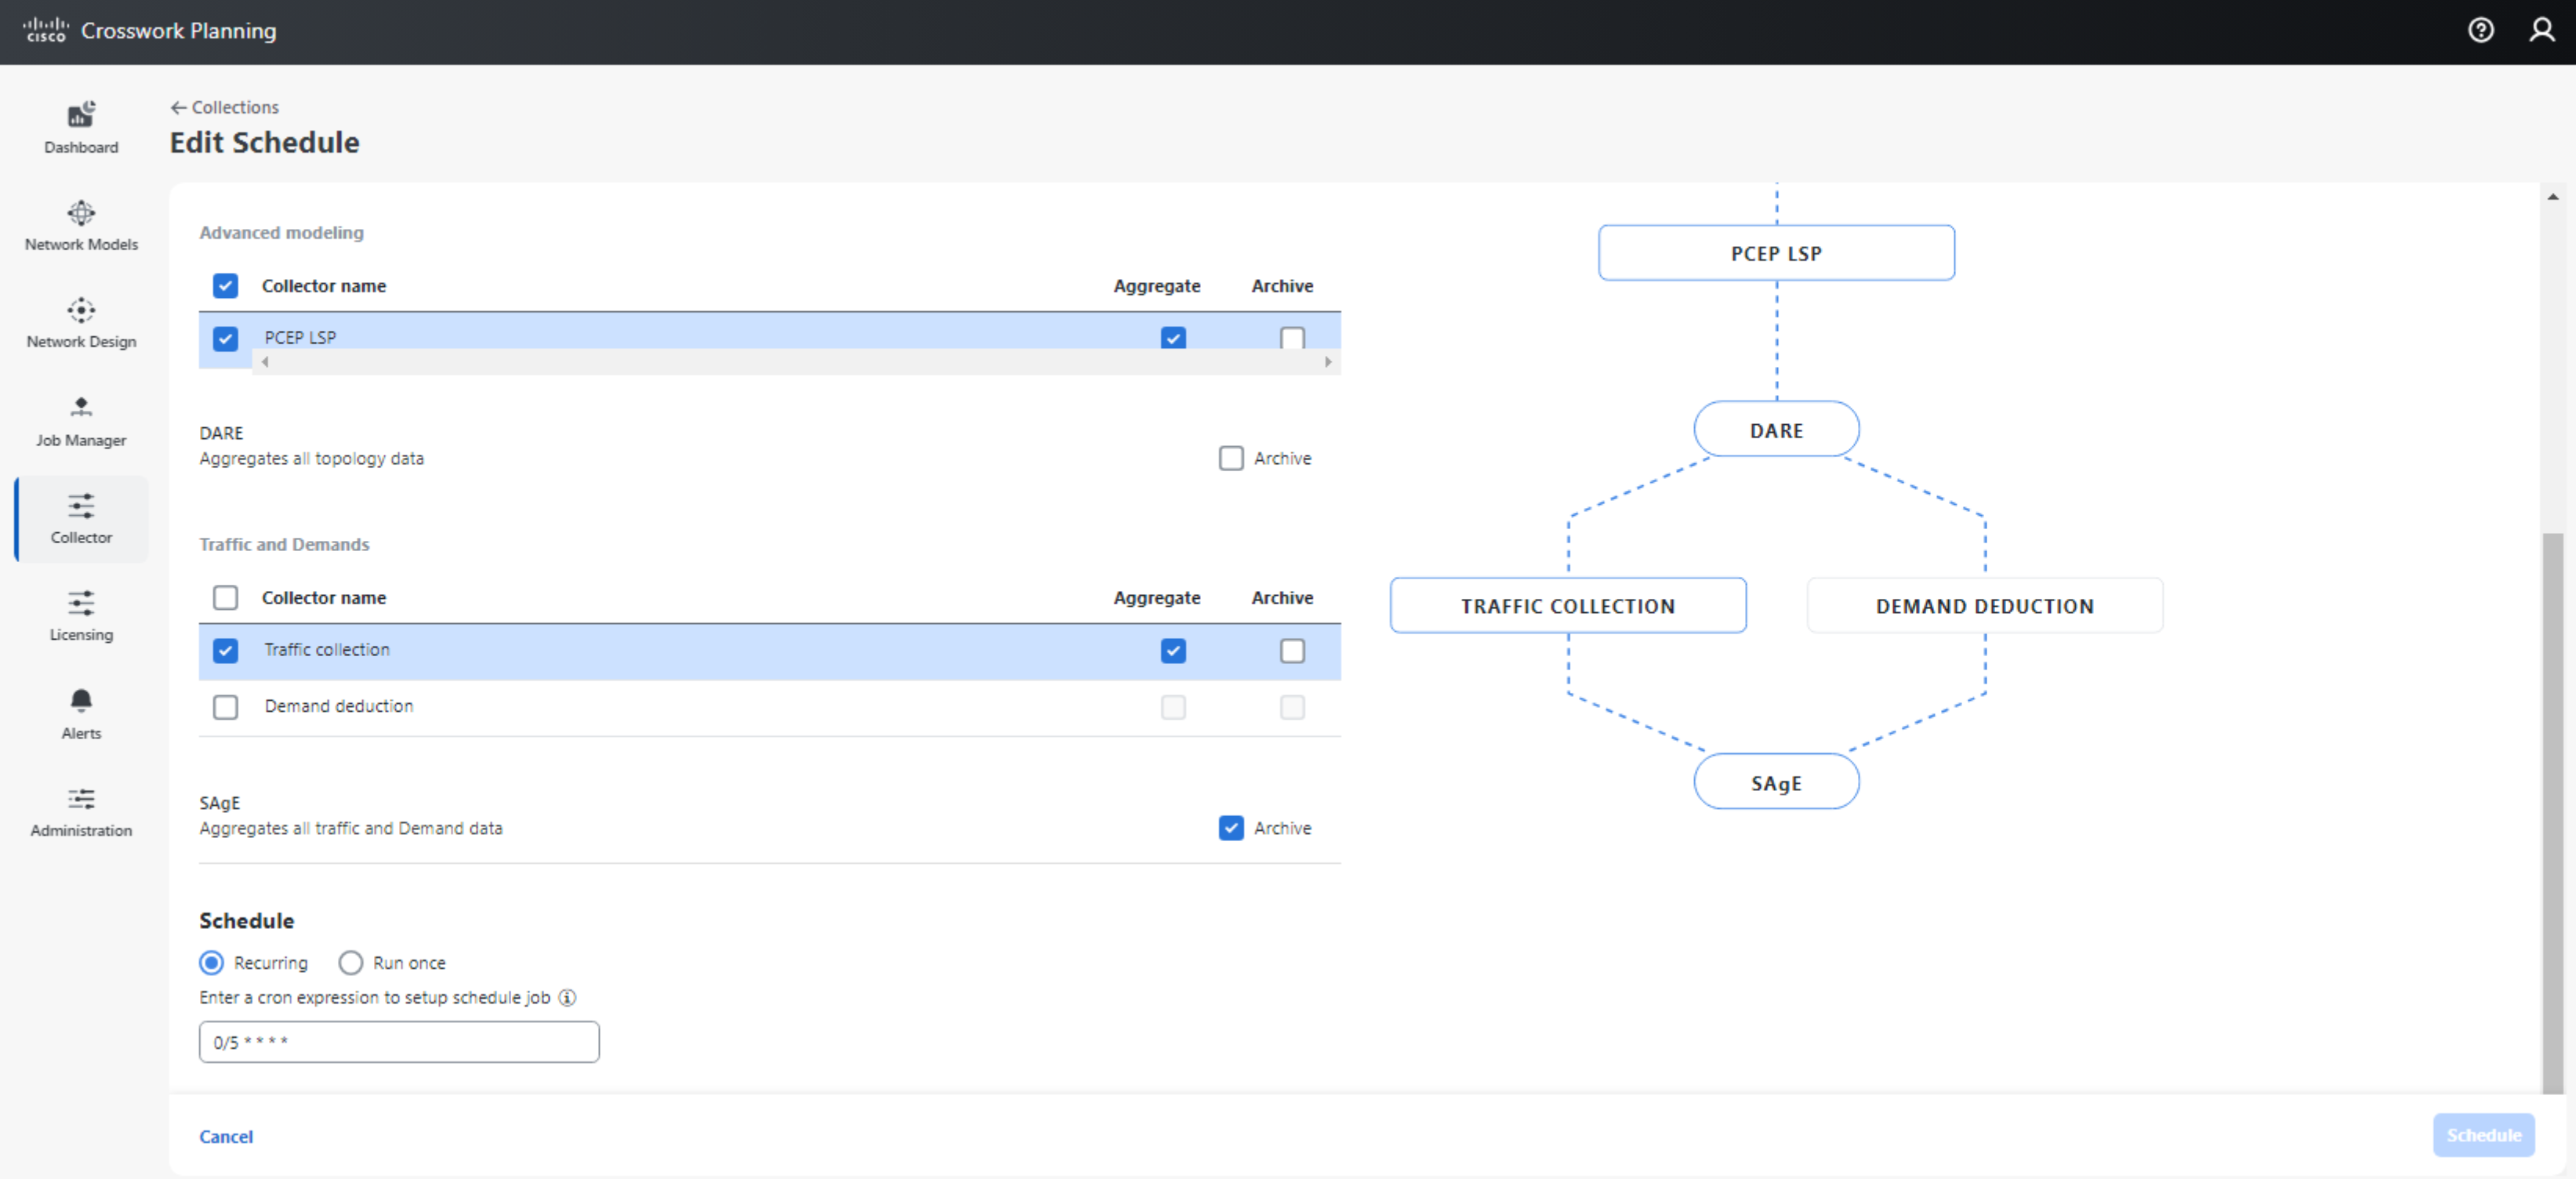
Scheduling Collection
An excellent way to determine if the collection setup has been configured correctly is to initiate a one-shot collection. This may be performed by selecting the ellipsis icon under the Actions column and then selecting Run Now. If the collection is successful, the Status column will indicate a green checkmark with Finished. 
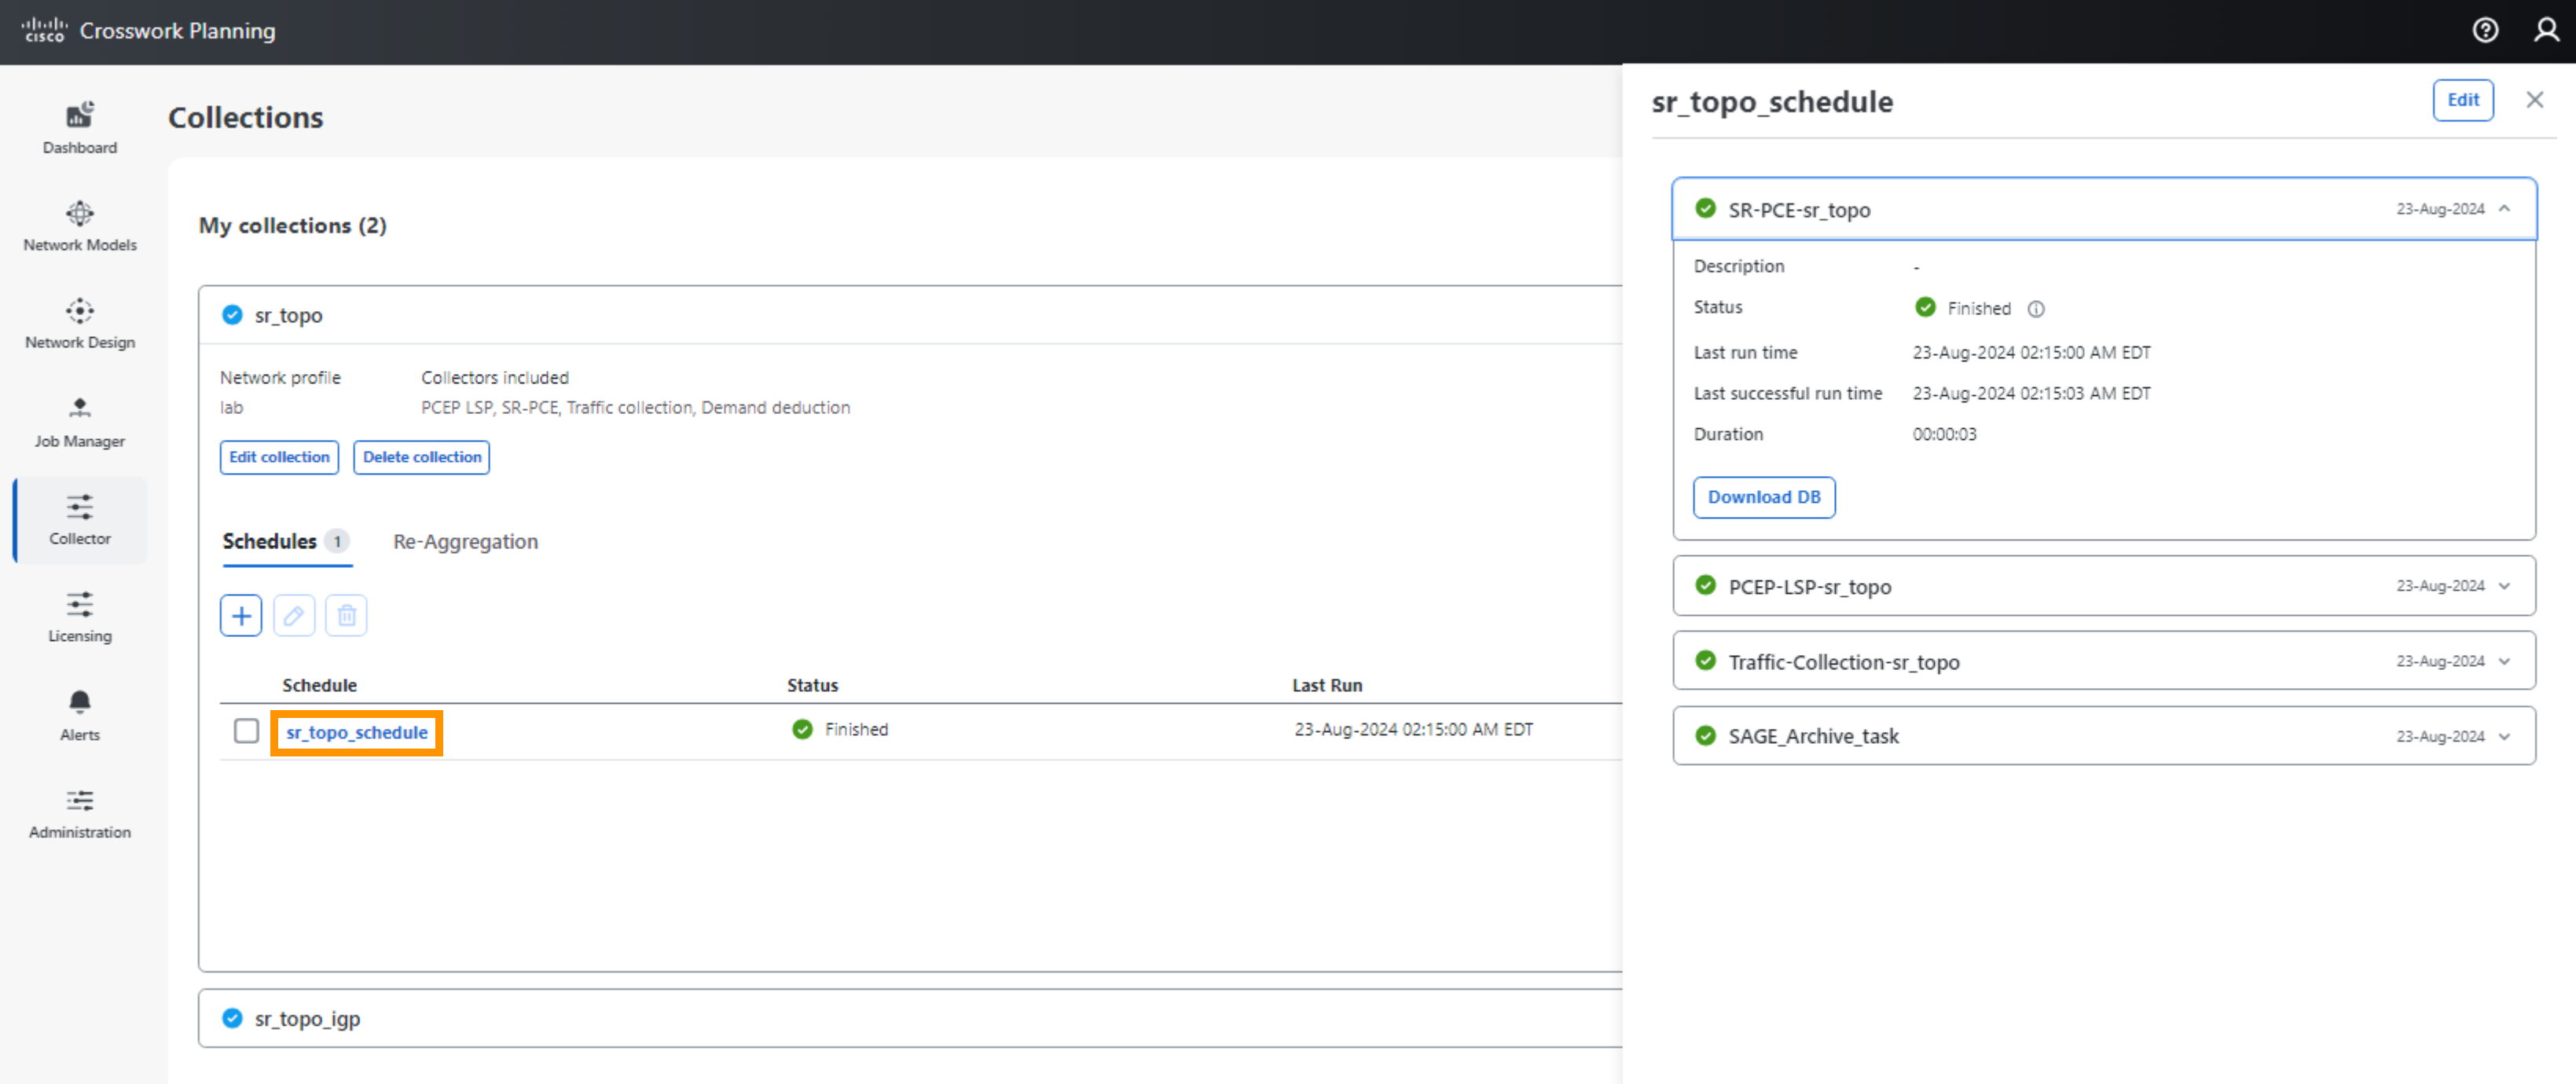
Once we have determined that the collection is satisfactory, we can enter a recurring schedule for collection to be performed automatically.
In the example below, we have used a cron expression for a 5 min collection cadence.
0/5 * * * *
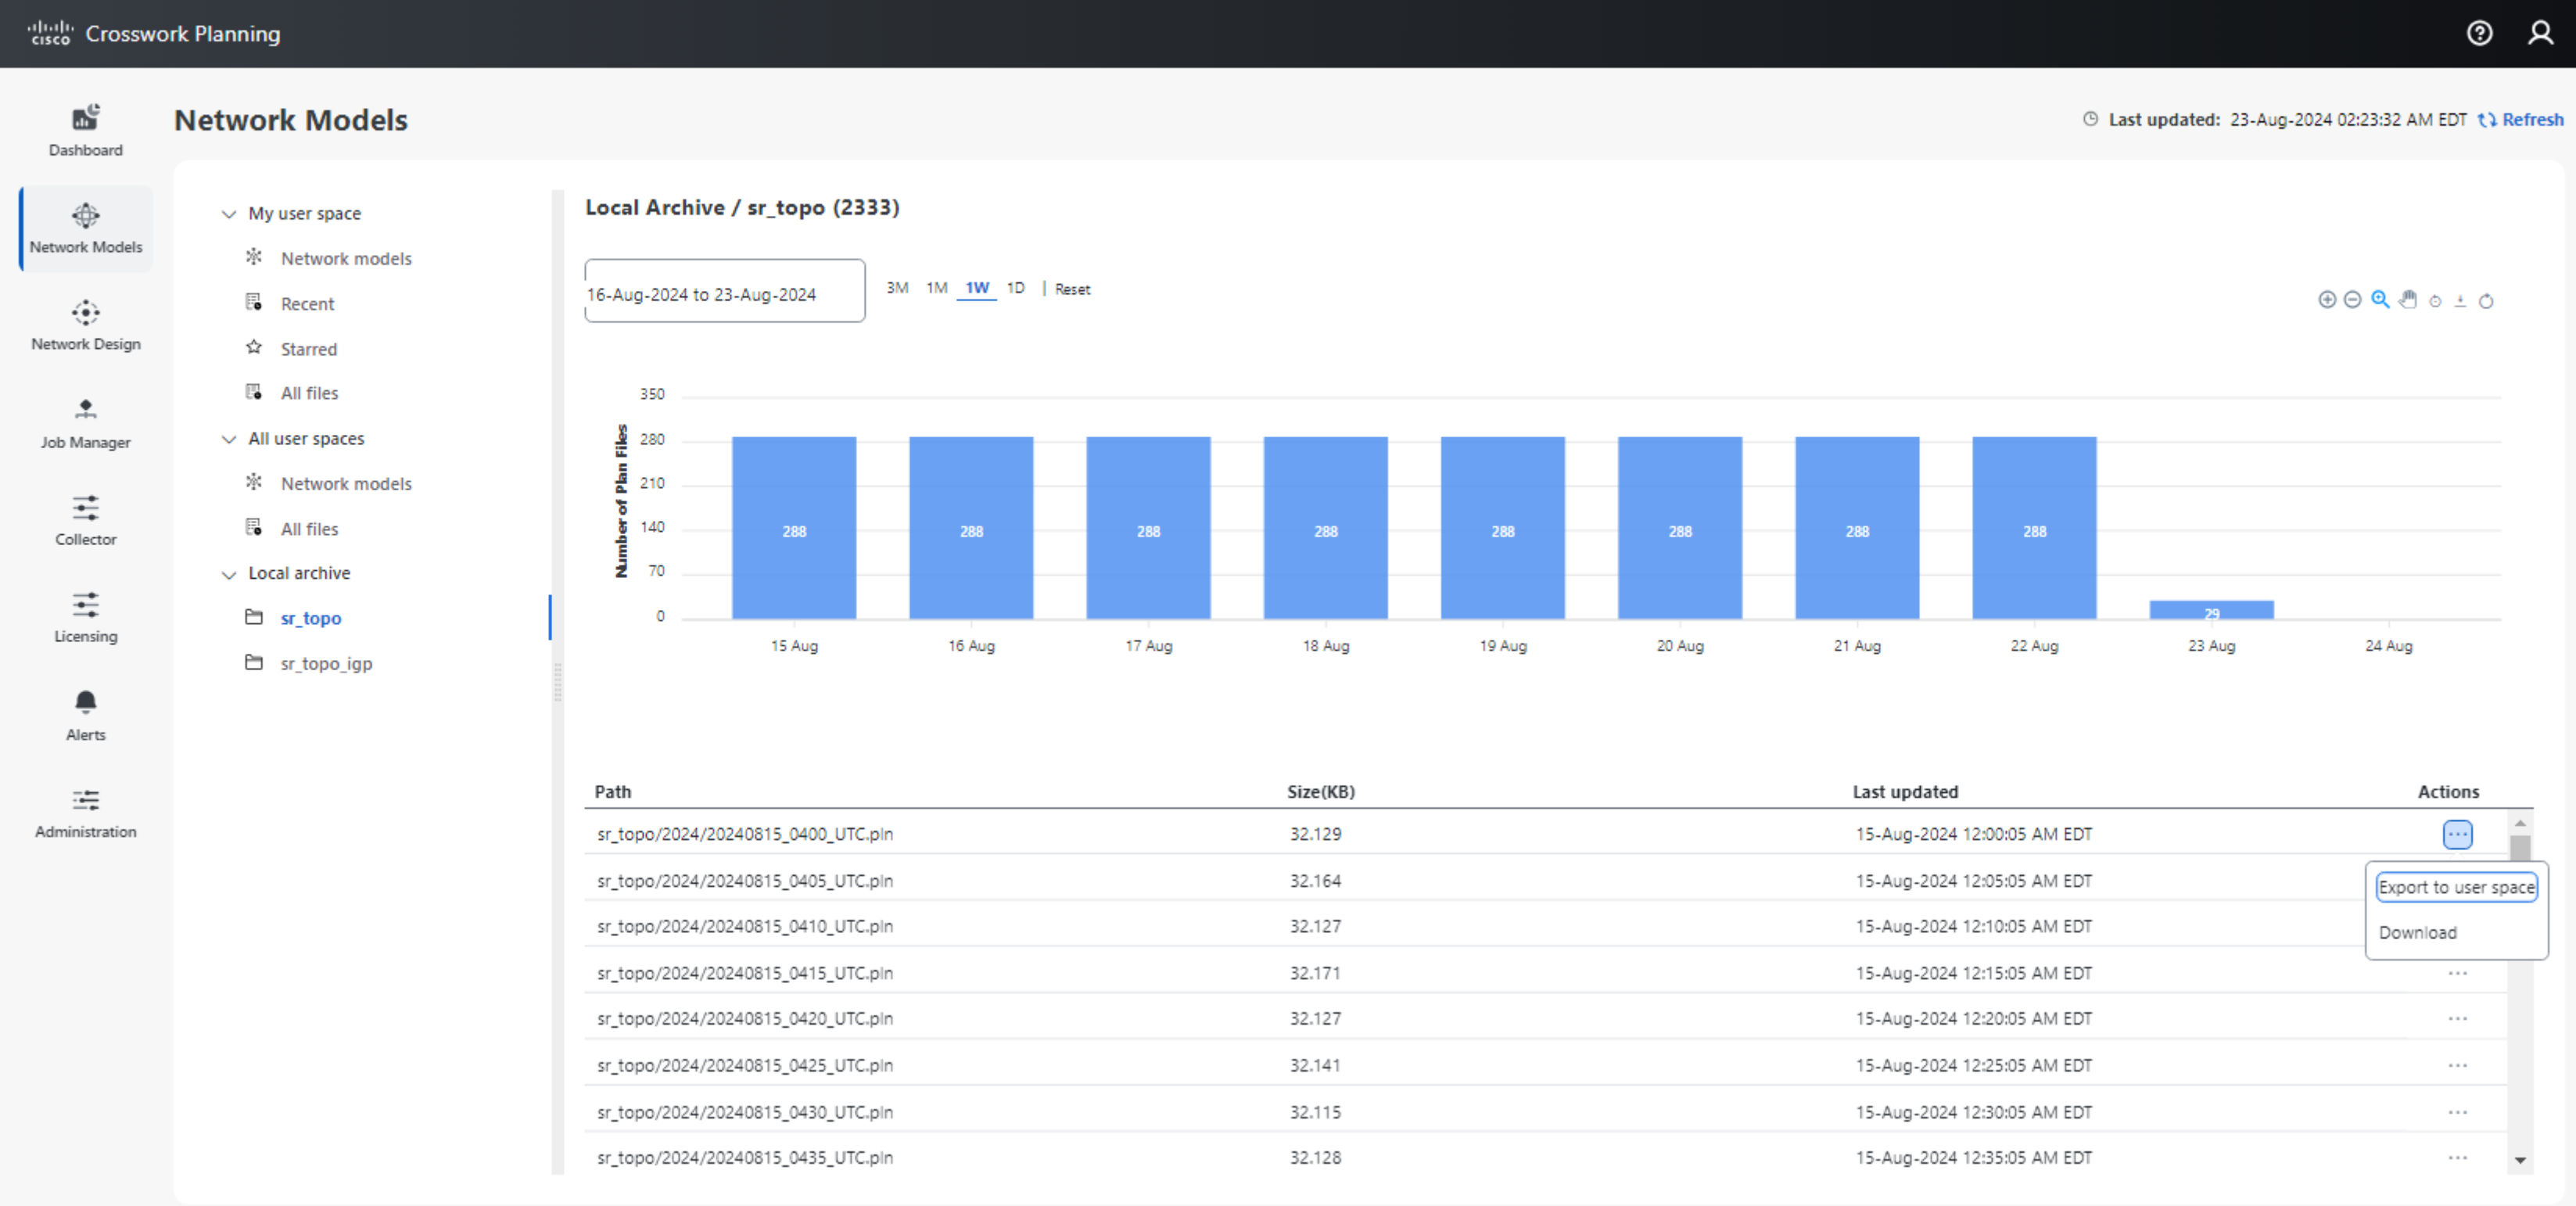
Viewing Collected Network Models
The network models from the completed collection may be access under Network Models > Local archive > collection name. In order for us to view the collected network models, we will need to select the ellipsis icon under the Actions column and then select Export to user space. The network model will be accessible under My user space > Network Models.
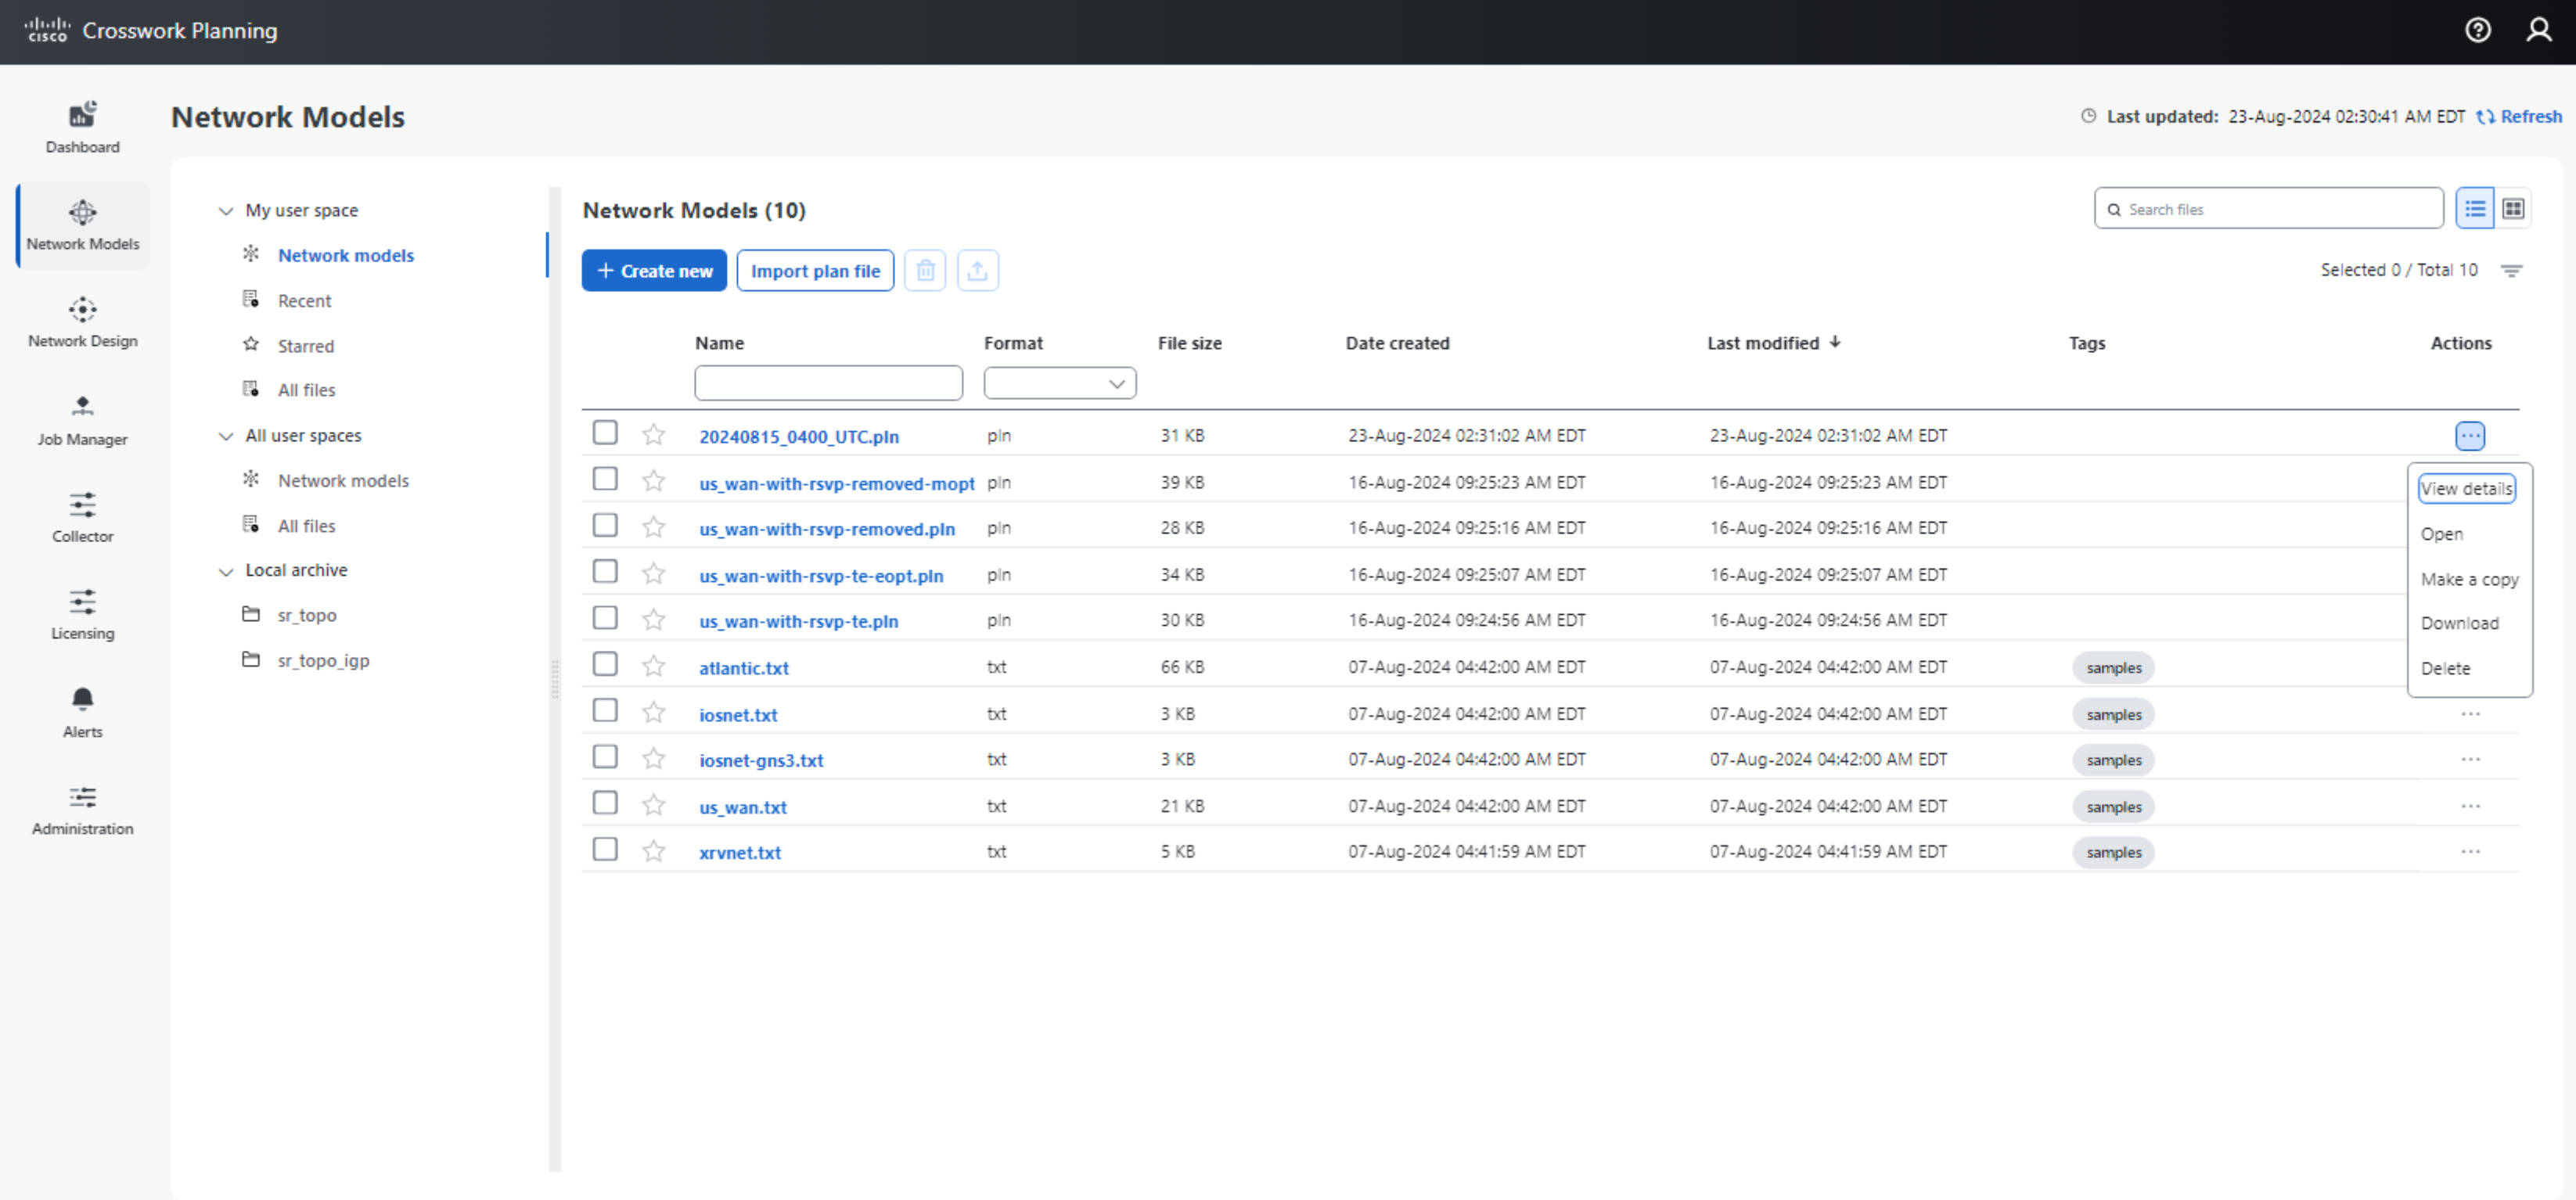
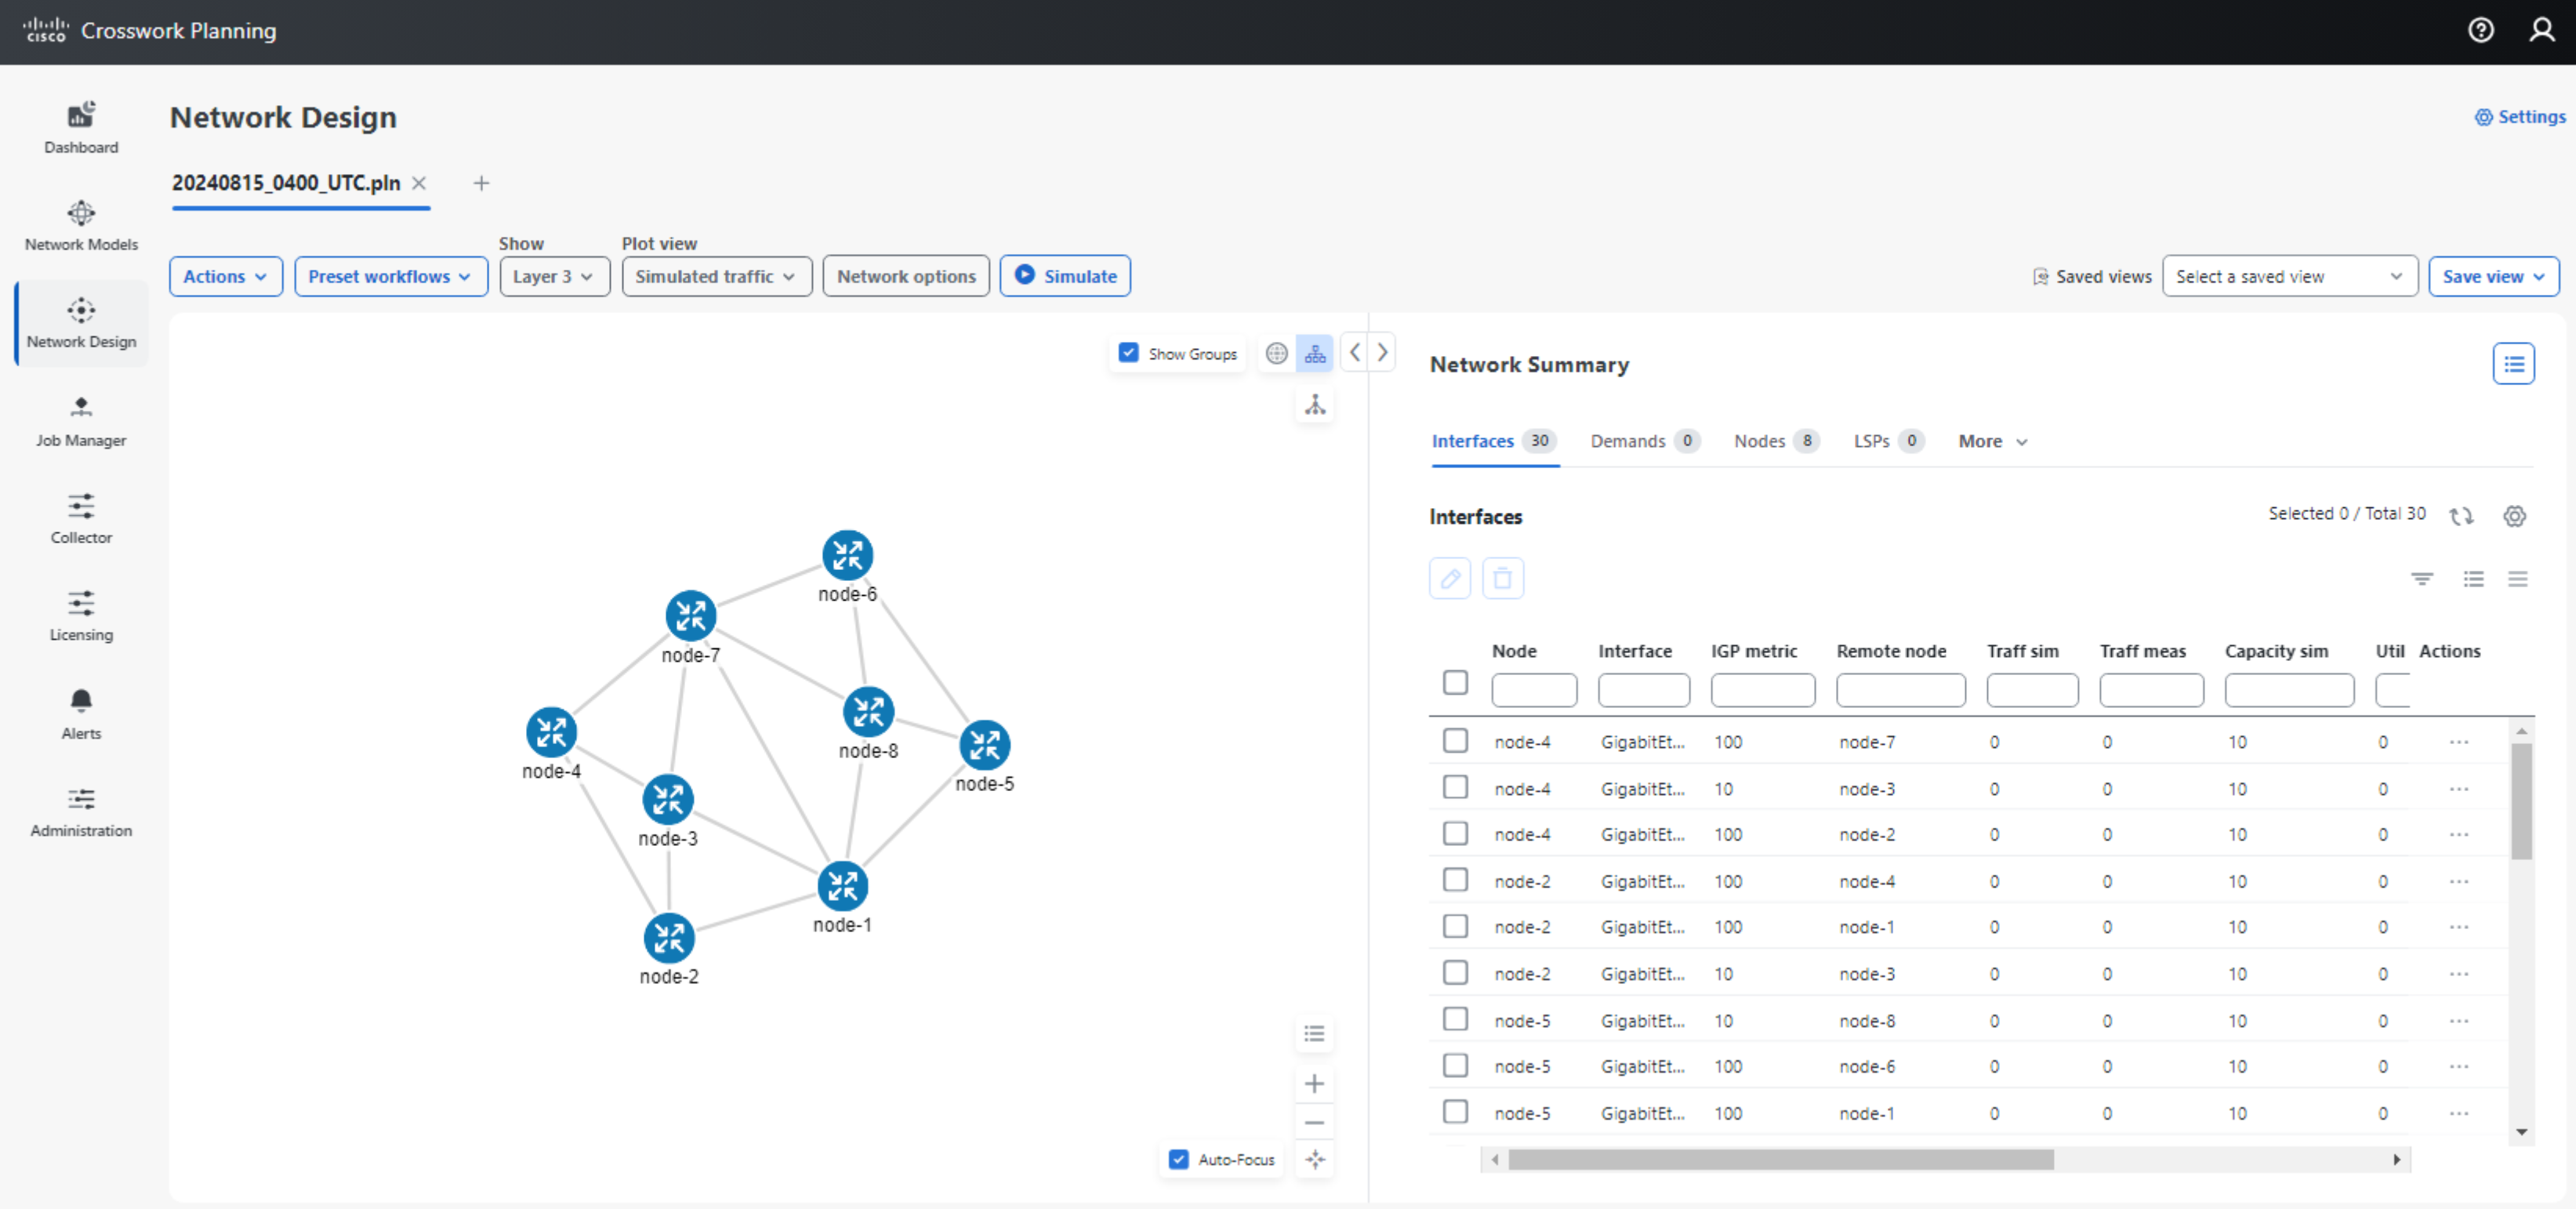
The user may open the network model under Crosswork Planning Design.
Conclusion
Crosswork Planning collector provides a user friendly graphical interface for setting up network collection. This allows the collection and model-building process to be set up easily without requiring intimate knowledge of the model-building process, which translates to greater efficiency.
For more information, please refer to the Crosswork Planning Installation Guide, Collection Setup and Administration Guide, and Design User Guide.
Leave a Comment