Programming IOS-XR with gRPC and Go
Introduction
The goal of this tutorial is to demonstrate how to program an IOS XR device using the gRPC framework. For this purpose, we will use a gRPC library for Cisco IOS XR written in Go. The objective is to have a single interface/connection to retrieve info from the device, apply configs to it, generate telemetry streams, program the RIB/FIB and so on.
We picked Go, due its simplicity, readability, portability and concurrency primitives.
This tutorial assumes that you have gone through the XR Toolbox Series before. If you haven’t checked out the earlier parts to the XR toolbox Series, then you can do so here:
Prerequisites
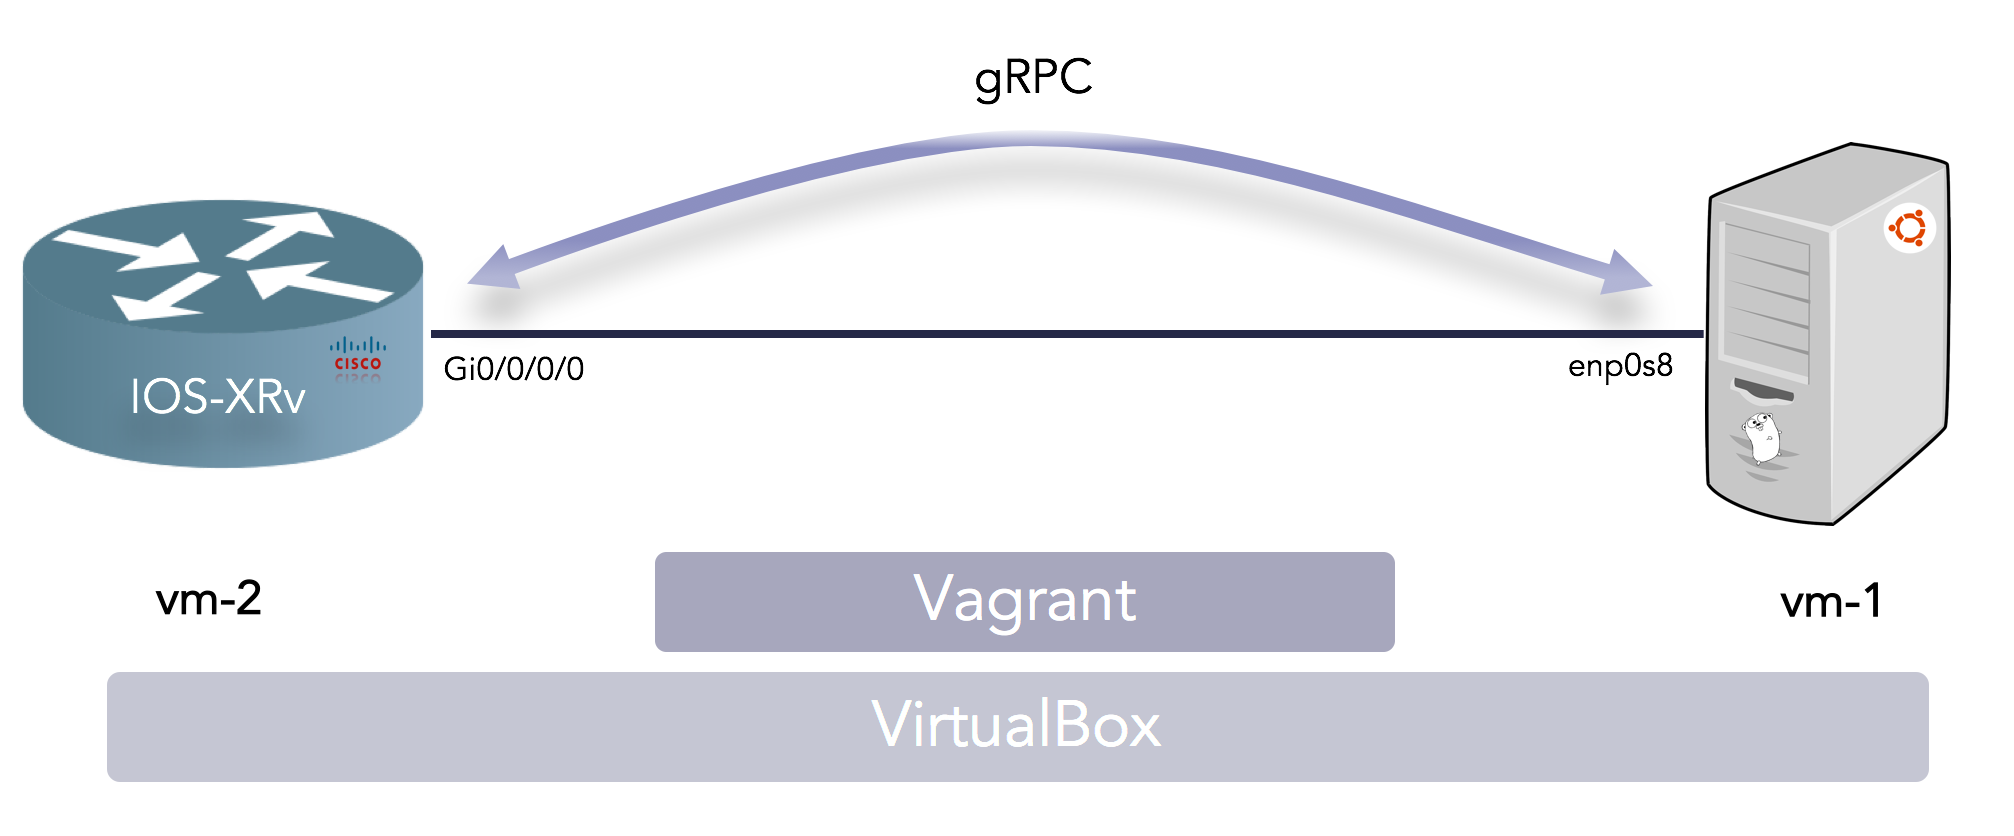
We will use this Vagrantfile to setup and run the topology as shown below:

So you basically need to make sure you download the IOS XRv image as described here: IOS-XR Vagrant Quick Start and install Vagrant and VirtualBox.
Then run vagrant up in the folder where you have the Vagrantfile.
Request access to the IOS XRv Vagrant box by filling up the form here. This example was run with IOS XR version 6.1.2.
Configuring the router for secure gRPC connections
First login to the router (password: vagrant).
ssh -p 2223 vagrant@localhost
Apply the following gRPC and interface config.
grpc
 port 57344
 tls
 !
 address-family ipv4
!
interface GigabitEthernet0/0/0/0
 ipv4 address 192.0.2.1 255.255.255.0
 no shut
 !
Then copy the content of the certificate file generated in /misc/config/grpc/. We will need this info later on.
bash cat /misc/config/grpc/ems.pem
Installing Go on the Ubuntu VM
First login to the Ubuntu VM.
vagrant ssh vm-1
Let’s start by installing Go as described in the Go Wiki.
sudo add-apt-repository ppa:longsleep/golang-backports
sudo apt-get update
sudo apt-get install golang-1.8-go -y
Now that we have installed Go, let’s create a workspace directory.
mkdir $HOME/go
mkdir $HOME/go/src
mkdir $HOME/go/bin
mkdir $HOME/go/pkg
And setup some environment variables. You might want to write these to your profile file.
export GOROOT=/usr/lib/go-1.8/
export GOPATH=$HOME/go
export PATH=$PATH:$GOPATH/bin:$GOROOT/bin
You can verify the installation as follows:
ubuntu@vm-1:~$ go version
go version go1.8.3 linux/amd64
ubuntu@vm-1:~$ cd $GOPATH
ubuntu@vm-1:~/go$ ls
bin  pkg  src
ubuntu@vm-1:~/go$
That’s it! Go is installed in the Ubuntu VM.
Getting the gRPC library for Cisco IOS XR
This is super easy with the Go tools.
go get github.com/nleiva/xrgrpc
That’s it!. All the code and dependencies are now in the VM.
Compiling the first example
In this example we will use the GetConfig RPC to request the config of the IOS-XRv device for the YANG paths specified in yangpaths.json.
{
    "Cisco-IOS-XR-ifmgr-cfg:interface-configurations": [null],
    "Cisco-IOS-XR-telemetry-model-driven-cfg:telemetry-model-driven": [null],
    "Cisco-IOS-XR-ipv4-bgp-cfg:bgp": [null],
    "Cisco-IOS-XR-clns-isis-cfg:isis": [null]
}
For this purpose we go to the definetarget4 example folder and copy the content of certificate file we obtained previously.
cd ~/go/src/github.com/nleiva/xrgrpc/example/definetarget4
vim ems.pem
Let’s just compile the code (main.go) for now.
go build
And now you can run the binary file created.
ubuntu@vm-1:~/go/src/github.com/nleiva/xrgrpc/example/definetarget4$ ./definetarget4
Config from 192.0.2.1:57344
 {
 "data": {
  "Cisco-IOS-XR-ifmgr-cfg:interface-configurations": {
   "interface-configuration": [
    {
     "active": "act",
     "interface-name": "MgmtEth0/RP0/CPU0/0",
     "Cisco-IOS-XR-ipv4-io-cfg:ipv4-network": {
      "addresses": {
       "dhcp": [
        null
       ]
      }
     }
    },
    {
     "active": "act",
     "interface-name": "GigabitEthernet0/0/0/0",
     "Cisco-IOS-XR-ipv4-io-cfg:ipv4-network": {
      "addresses": {
       "primary": {
        "address": "192.0.2.1",
        "netmask": "255.255.255.0"
       }
      }
     }
    }
   ]
  }
 }
}

2017/08/04 18:51:00 This process took 901.242827ms
A few pointers on the code
We will document a complete walk-through in a following tutorial. Well, if you are impatient like me, you can take a look at other examples documented in the repo in the meantime.
In this example we basically did four things.
1) Parse the YANG path input. If none, the default is ../input/yangpaths.json.
  ypath := flag.String("ypath", "../input/yangpaths.json", "YANG path arguments")
  flag.Parse()
2) Identify the target. IP address, user credentials, cert file location and a timeout.
  router, err := xr.BuildRouter(
      xr.WithUsername("vagrant"),
      xr.WithPassword("vagrant"),
      xr.WithHost("192.0.2.1:57344"),
      xr.WithCreds("ems.pem"),
      xr.WithTimeout(5),
  )
3) Connect to the device. This has to be done just once for all the following RPC calls. In this example we are just making one, but this connection can be re-used to configure the device, generate a telemetry stream or program the RIB/FIB.
  conn, ctx, err := xr.Connect(*router)
  if err != nil {
      log.Fatalf("Could not setup a client connection to %s, %v", router.Host, err)
  }
  defer conn.Close()
4) Make the GetConfig call and print out the response.
  output, err = xr.GetConfig(ctx, conn, string(js), id)
  if err != nil {
      log.Fatalf("Could not get the config from %s, %v", router.Host, err)
  }
  fmt.Printf("\nConfig from %s\n %s\n", router.Host, output)
This concludes this tutorial/example. Stay tuned for more!.
Some useful links below:
Leave a Comment