
pyATS series - How to use the NETCONF module?
Introduction
Ever dreamed of a test framework that could be used across multiple platforms, OS and vendors, which could do regression, sanity and feature testing; already used by thousands of engineers and developers worldwide? Guess what, it exists, it’s free, and you can start using it right now!
pyATS (Python Automated Test Systems, to be pronounced “py A. T. S.”) was first created as an internal project, to ease the validation of two OS versions. It has been made public in 2017 through Cisco Devnet.
Other pyATS episodes
You’ve missed the first episode? You would like to read more? Below the list of published episodes:
Abstract
In this new episode, what will see how to use the pyATS NETCONF module. First, we will understand how to find the YANG model you need, build the NETCONF RPC and how to interact with your device via the pyATS NETCONF module.
In today’s example we are going to do a traceroute between two IOS XR nodes. As of today, this equivalent parser does not exist on IOS XR.
Network Topology
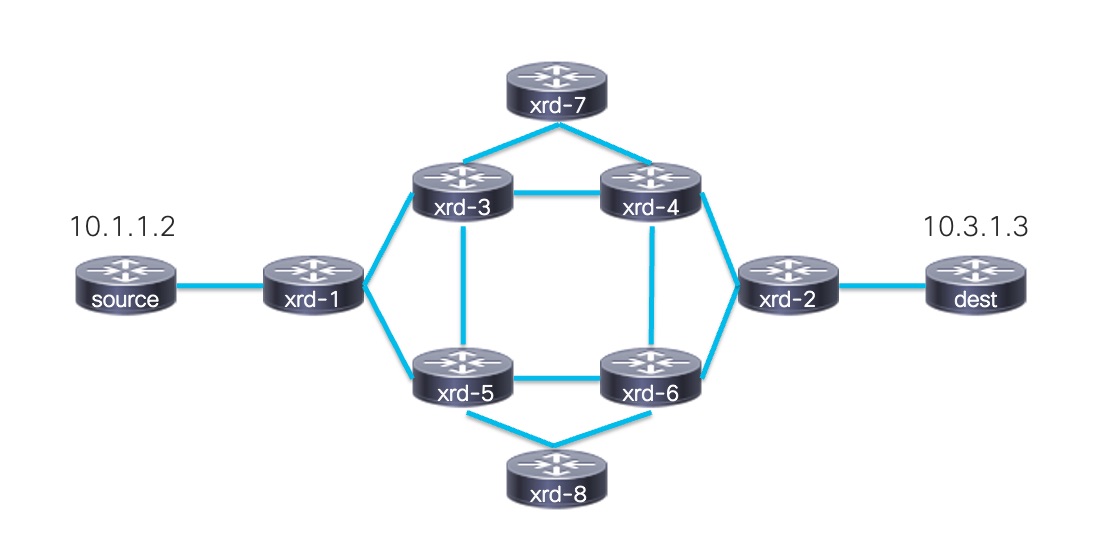
In today’s article, we will use the Segment Routing network topology, based on IOS XRd. It’s available on this github repo.
The topology in the above repo has been slightly changed to adapt to our use case. For instance, we are using proper IOS XRd routers as source and destination (not linux hosts), so we can benefit from all IOS XR networking features. You can find those changes (each node startup configuration and docker-compose.xr.yaml) here.
You can read more on XRDocs about what’s IOS XRd and how to use it here.
The topology will look like below. We will send traffic between a source and a destination and influence the traffic’s path using Segment Routing Policies.
IP Addressing
Management IP addresses are in the range 172.40.0.0/24. 101 to 108 are respectively associated from xrd-1 to xrd-8. 200 and 201 are respectively associated to xrd-source and xrd-dest.
Adjacency links addresses are in the range 100.0.0.0/8. Second and third byte are associated with the two routers on each side of the link. Fourth byte represents the node. Ex: 100.106.108.0/24 represents the link between xrd-6 and xrd-8. 100.106.108.108 belong to an interface on xrd-8.
Source and Destination addresses are respectively 10.1.1.2 and 10.3.1.3.
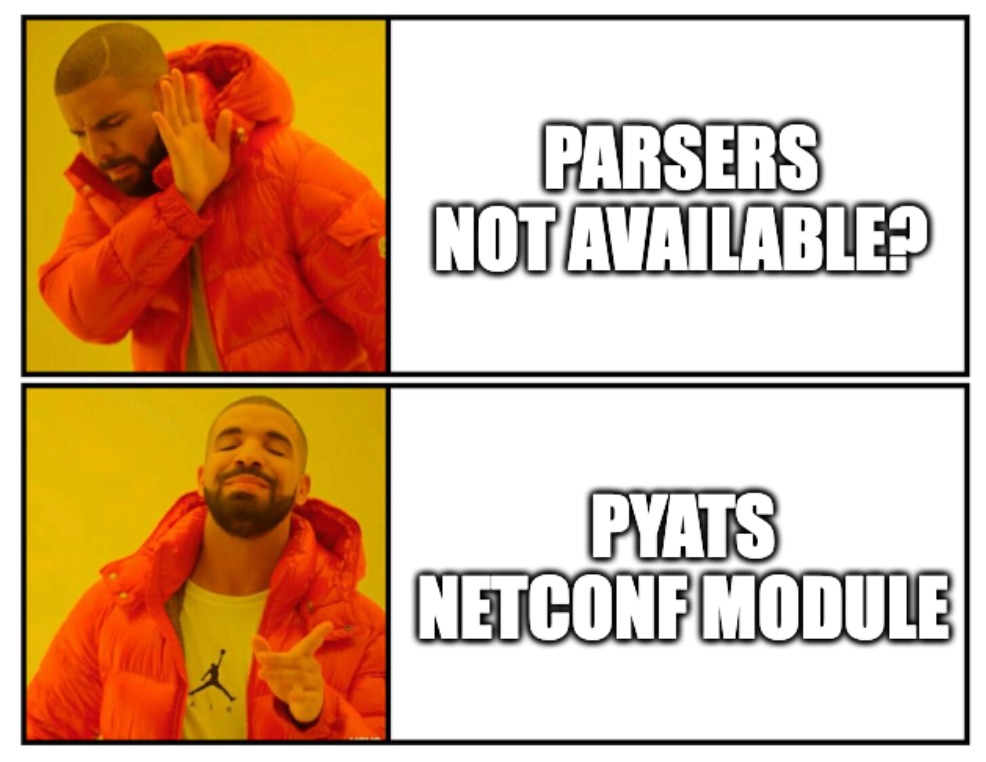
Why using pyATS NETCONF module?
Why would you use pyATS NETCONF module when you could just leverage pyATS librairies (i.e. embedded parsers)? I see two reasons. First, maybe the parser just doesn’t exist yet. In this case, knowing how to leverage pyATS NETCONF module could save you a lot of pain compared to parsing raw text yourself. Second, device outputs can evolve or be slightly different from one operational state to another. For example, in a traceroute, what if the output prints MPLS labels? Is the parser ready to understand it or does it only expect IP addresses? YANG models are maintened by the vendor while pyATS parsers are maintained by the community based on use-cases.
There is no good or bad option between pyATS librairies (parsers) and pyATS NETCONF module; as long as it works and you understand the pros and cons for each.
How to find the YANG model you need?
All Cisco YANG models for all operating systems can be found on this Github repository.
We used to be able to use the Github searchbar to filter based on a specific folder/path. I understand that vendor code is now excluded from this search filtering capability. My advise is to download only the folder you need (example: /vendor/cisco/xr/771) using this tool download it on your machine.
You can use the grep command to find a search-pattern in a specific directory. Below is an explanation of what each flag does. Feel free to adapt then to your convenience:
-l: This flag stands for “list,” and when used with grep, it instructs grep to only list the names of files that contain the specified pattern, rather than displaying the matching lines within those files. This can be useful if you want to know which files in a directory or multiple directories contain a certain text pattern.-i: This flag stands for “ignore case,” and it tells grep to perform a case-insensitive search.-r: This flag stands for “recursive,” and it tells grep to search for the specified pattern not only in the specified files but also in all subdirectories recursively.
Here is what the full command looks like with a sample output:
❯ grep -lir traceroute
./Cisco-IOS-XR-mpls-traceroute-act.yang
./Cisco-IOS-XR-ipv4-acl-datatypes.yang
./Cisco-IOS-XR-ethernet-cfm-oper-sub1.yang
./Cisco-IOS-XR-ethernet-cfm-oper.yang
./Cisco-IOS-XR-ethernet-cfm-cfg.yang
./Cisco-IOS-XR-ethernet-cfm-act.yang
./Cisco-IOS-XR-ethernet-cfm-oper-sub2.yang
./Available-Content.md
./Cisco-IOS-XR-ethernet-cfm-oper-sub3.yang
./Cisco-IOS-XR-ipv4-traceroute-act.yang
./Cisco-IOS-XR-ipv6-traceroute-act.yang
./Cisco-IOS-XR-ethernet-cfm-oper-sub4.yang
./Cisco-IOS-XR-ip-udp-oper-sub2.yang
./Cisco-IOS-XR-ip-tcp-oper-sub4.yang
Now that we only have a few models, you can use YANG Suite to explore these models and verify they contain what you are looking for. In our case, the right top-level model will be Cisco-IOS-XR-traceroute-act. If you read the model, you can see that ipv4, ipv6 and mpls traceroute are submodules that all belong to Cisco-IOS-XR-traceroute-act.
submodule Cisco-IOS-XR-ipv6-traceroute-act {
  belongs-to Cisco-IOS-XR-traceroute-act {
You can read how to use YANG Suite in this article.
How to build the RPC?
In order to ask your device what output you want and which filters you would like to apply, we need to build the appropriate RPC.
I have already covered how to add a new YANG model repository and how to create a YANG set in this article. We will move directly to the specific actions in this article.
Here are the steps we need to take in order to build the RPC:
- Go the Protocols > NETCONF.
- Pick the YANG Set you created and the Module
Cisco-IOS-XR-traceroute-actand Load Module(s). - Expend the model and go to traceroute > input > ipv4 > destination and put the IP address of the remote device.
- Click Build RCP.
Below is a sample screenshot of YANG Suite to reproduce the above steps.

Here is the RPC I am going to use based on my topology.
<rpc xmlns="urn:ietf:params:xml:ns:netconf:base:1.0" message-id="101">
  <traceroute xmlns="http://cisco.com/ns/yang/Cisco-IOS-XR-traceroute-act">
    <ipv4>
      <destination>10.3.1.3</destination>
    </ipv4>
  </traceroute>
</rpc>
Making the testbed
In a testbed, you need to specify that we want to use the NETCONF connector. Below is an example. Note that we can use multiple connection methods for the same device. For the NETCONF method, do not forget to set the class to yang.connector.Netconf.
You can find the source code for the pyATS yang NETCONF connector in the documentation.
Creating the Python logic
Now that we have each individual building block, we want to assemble all of them to create the Python logic to execute the traceroute via the NETCONF RPC and be able to work with the output.
Handling multiple connection methods
If you have multiple connection methods for a device, you need to specify which one you would like to use in the device.connect() method. For example: source.connect(via='netconf', log_stdout=True). Here, netconf refers to the netconf connection method, in the testbed. You can choose the name you want.
You can verify you are successfuly connected to the device using the connection method you specified with the attribute device.connected. It should return True if you are successfuly connected.
Sending the RPC request
To send a RPC request, you can use the device.netconf.request() method. You can give two parameters: the rpc_request you would like to send (as string) and optionally the timeout value. Here, we will set it to 120 seconds.
Below is an example:
To work with XML, you can use the xmltodict Python module. We will see an example in the next part.
Assembling Python building blocks
Below is an example of the full script and the Python logic to print the IP address of each hop of the traceroute.
For your information, here is the an example of the reply output, after we parsed the XML reply. You can see that we have the exact same information as in the raw output (when using CLI) but already structured.
Conclusion
In this seventh episode of the pyATS series, we saw how retrieve a structured output using NETCONF. We took a traceroute as example.
The code used for each blog post can be found here. This link will include the code for all posts.
Resources
Below a few useful pyATS resources.
Leave a Comment